Controls and configuration
Intro
Rigs of Rods is a simulator which strives for maximum realism, and hence you need an appropriate controller, such as a wheel for land vehicles and joystick for aerial or marine vehicles.
Input is configured from the in-game Controls menu (Keyboard only), editing configuration file input.map, or by using the Input Mapping Tool.
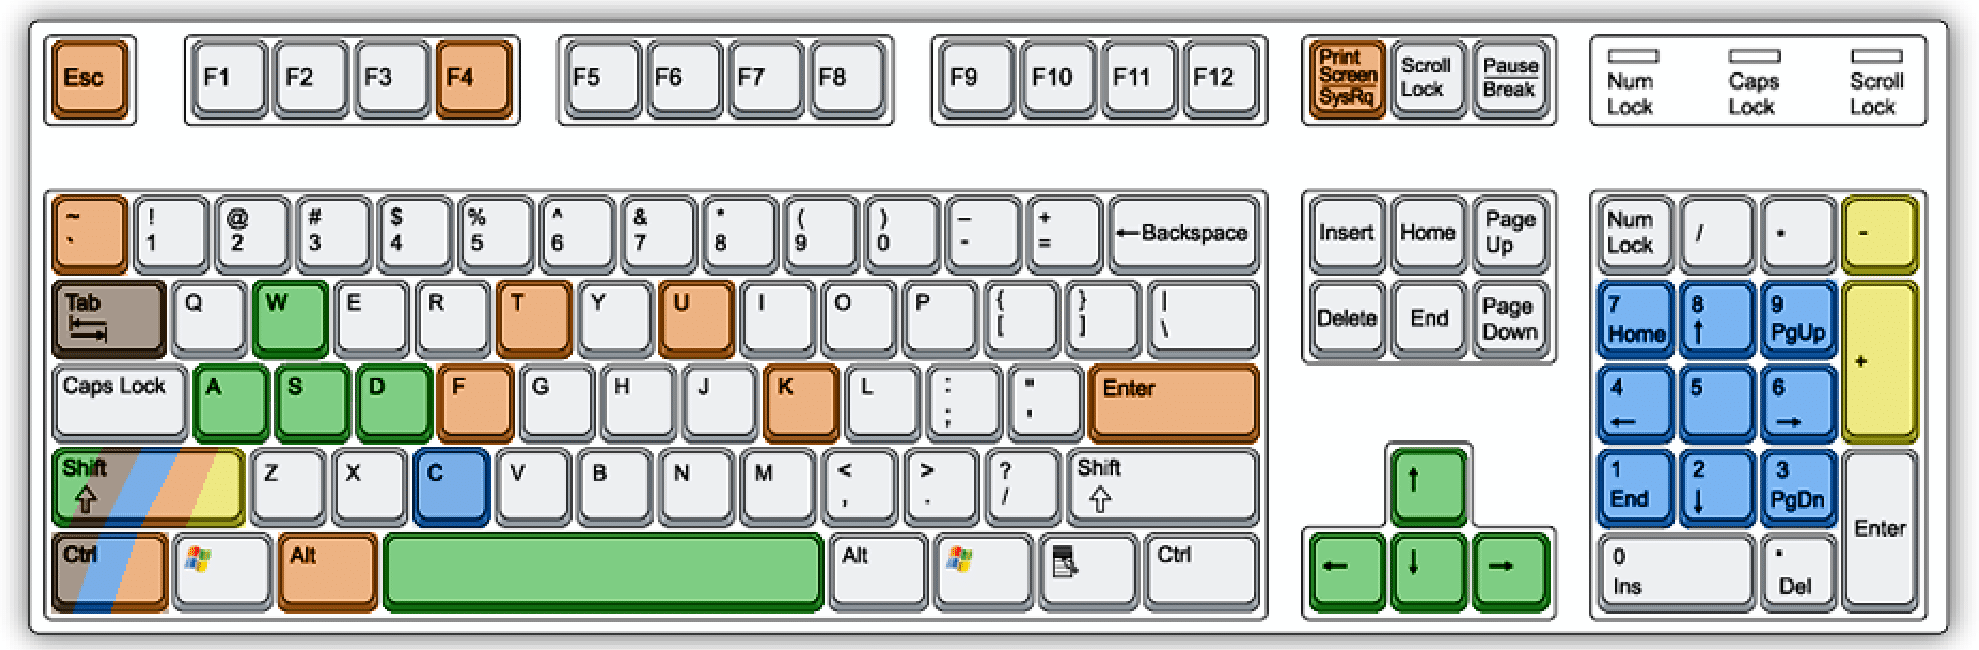
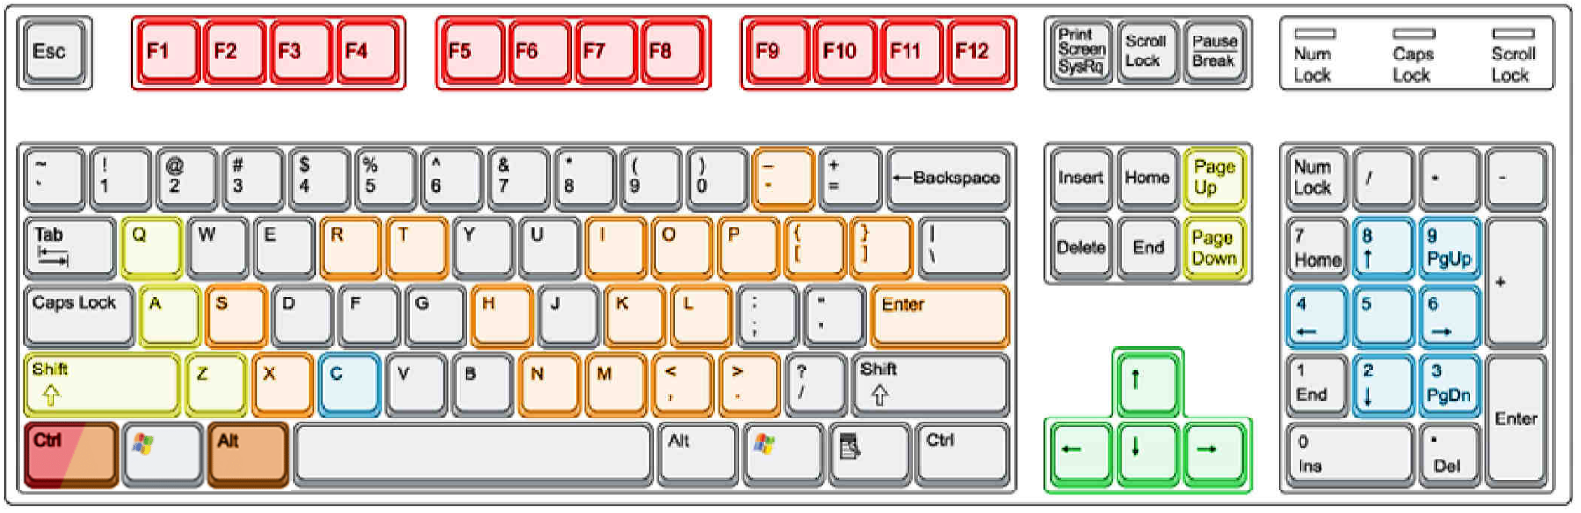
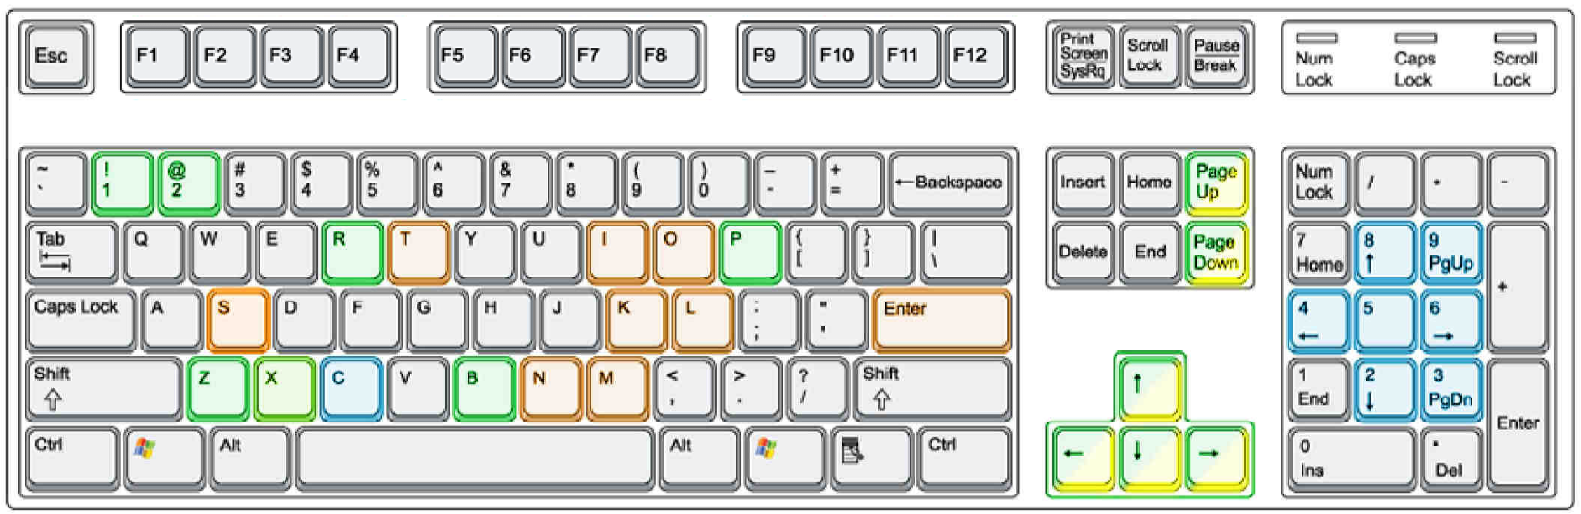
Keyboard layout
General controls
| General | Key |
|---|---|
| Pause game | ESC |
| Quit game | ALT+F4 |
| Spawn new vehicle | CTRL+G |
| Enter or exit vehicle | ENTER |
| Reset vehicle | I |
| Reset vehicle in place | BACKSPACE |
| View vehicle statistics | T |
| View vehicle commands | CTRL+T |
| Screenshot | Print Screen/SYSRQ |
| Chat (Multiplayer) | Y |
| Toggle HUD | U |
| Toggle soft reset mode | APOSTROPHE |
| Toggle limited camera movement | SHIFT+SPACE |
| Adjust simulation speed | CTRL+= / SHIFT+= |
| Reset simulation speed/set preset | BACKSLASH |
| Switch between vehicles | CTRL+RBRACKET / CTRL+LBRACKET |
| Remove current vehicle | CTRL+Del |
| Respawn last vehicle | CTRL+ . (period) |
Character
| Character | Key |
|---|---|
| Jump | SPACE |
| Turn right | RIGHT |
| Turn left | LEFT |
| Walk forwards | UP |
| Walk backwards | DOWN |
| Run | SHIFT+UP |
Camera
| Camera | Key |
|---|---|
| Change view | C |
| Rotate up/down | Numpad 8 / Numpad 2 |
| Rotate left/right | Numpad 4 / Numpad 6 |
| Zoom in/out | Numpad 9 / Numpad 3 |
| Zoom in/out (fast) | SHIFT+Numpad 9 / SHIFT+Numpad 3 |
| Free camera | SHIFT+C |
| Fixed camera | ALT+C |
| Decrease FOV | Numpad 7 |
| Increase FOV | CTRL+Numpad 7 |
| Reset FOV | SHIFT+Numpad 7 |
Time
Sky type must be set to Caelum or SkyX. Sandstorm sky does not support time change.
| Time Adjust | Key |
|---|---|
| Change time | Numpad + (plus) / Numpad - (minus) |
| Change time (fast) | SHIFT+Numpad + (plus) / SHIFT+Numpad - (minus) |
Overview map
| Map | Key |
|---|---|
| Toggle map view | TAB |
| Zoom in/out | CTRL+TAB / SHIFT+TAB |
| Toggle alpha | CTRL+SHIFT+TAB |
| Toggle icons | CTRL+SHIFT+ALT+TAB |
Saves
Note
You can load a savegame from the main menu.
| Savegames | Key |
|---|---|
| Quick save | NUMPAD / (divide) |
| Quick load | NUMPAD * (multiply) |
| Save slot 1 | CTRL+ALT+1 |
| Save slot 2 | CTRL+ALT+2 |
| Save slot 3 | CTRL+ALT+3 |
| Save slot 4 | CTRL+ALT+4 |
| Save slot 5 | CTRL+ALT+5 |
| Load slot 1 | ALT+1 |
| Load slot 2 | ALT+2 |
| Load slot 3 | ALT+3 |
| Load slot 4 | ALT+4 |
| Load slot 5 | ALT+5 |
Common vehicle controls
| Basic vehicle controls | Key |
|---|---|
| Steer Left | LEFT |
| Steer Right | RIGHT |
| Accelerate/Brake | UP / DOWN |
Shifting
| Shifting | Key |
|---|---|
| Autoshift up | PGUP |
| Autoshift down | PGDOWN |
| Switch shift modes | Q |
| Manual clutch | SHIFT |
| Shift up | A |
| Shift down | Z |
Lights
| Misc | Key |
|---|---|
| Toggle headlights | N |
| Toggle beacons | M |
| Blinker left | , (comma) |
| Blinker right | . (period) |
| Blinker hazards | - (hyphen) |
| Custom lights (e.g. lightbars) | CTRL+1, CTRL+2 ... CTRL+9, CTRL+0 |
Misc
| Misc | Key |
|---|---|
| Truck horn | H |
| Parking brake | P |
| Trailer parking brake | CTRL+P |
| Toggle contact (ignition) | X |
| Starter (hold) | S |
| Attach trailer | L |
| Inter-wheel differentials | W |
| Inter-axle differentials | CTRL+W |
| Transfer case (2WD/4WD) | SHIFT+W |
| Alternate gear ratios | ALT+W |
| Secure Load | O |
| Show skeleton | K |
| Cycle skeleton views | CTRL+K |
| Rescue truck | R |
| Particle cannon (e.g. water cannons on fire trucks) | G |
| Tire Pressure (not supported by most vehicles) | RBRACKET [ / LBRACKET ] |
Commands
| Function keys | Combo |
|---|---|
| COMMANDS 01 | F1 |
| ... | ... |
| COMMANDS 12 | F12 |
| COMMANDS 13 | CTRL + F1 |
| ... | ... |
| COMMANDS 24 | CTRL + F12 |
| COMMANDS 25 | ALT + F1 |
| ... | ... |
| COMMANDS 36 | ALT + F12 |
| COMMANDS 37 | CTRL + ALT + F1 |
| ... | ... |
| COMMANDS 48 | CTRL + ALT + F12 |
| COMMANDS 49 | CTRL+ SHIFT + F1 |
| ... | ... |
| COMMANDS 58 | CTRL + SHIFT + F10 |
| COMMANDS 59 | CTRL + SHIFT + F11 |
| ... | ... |
| COMMANDS 68 | CTRL + ALT + F8 |
| COMMANDS 69 | CTRL + ALT + F9 |
| ... | ... |
| COMMANDS 78 | CTRL + SHIFT + ALT + F6 |
| COMMANDS 79 | CTRL + SHIFT + ALT + F7 |
| ... | ... |
| COMMANDS 83 | CTRL + SHIFT + ALT + F11 |
| COMMANDS 84 | CTRL + SHIFT + ALT + F12 |
Notes
-
Some vehicles use ALT+F4 as a command, which closes the game window. To avoid this press F4 then ALT.
-
Some laptops require you to hold the FN key in order to use commands.
Aerial and marine controls
Planes
| Airplane controls | Key |
|---|---|
| Steer left | LEFT |
| Steer right | RIGHT |
| Elevator up | UP |
| Elevator down | DOWN |
| Rudder right | X |
| Rudder left | Z |
| Brake | B |
| Parking brake | P |
| Reverse | R |
| Less flaps | 1 |
| More flaps | 2 |
| Less airbrakes | 3 |
| More airbrakes | 4 |
| Throttle down | PAGE-DOWN |
| Throttle up | PAGE-UP |
| Start engines | CLICK BUTTONS "ON" |
| Start all engines | CTRL+HOME |
| Full throttle | CTRL+PAGEUP |
| No throttle | CTRL+PAGEDOWN |
It is recommended to use: CTRL+Home to start all engines of a plane and CTRL+PAGE-UP to full throttle all engines because some planes could have more than 4 engines and you couldn't control them with your mouse.
Boats
| Boat controls | Key |
|---|---|
| Throttle down | DOWN |
| Throttle up | UP |
| Steer left | LEFT |
| Steer right | RIGHT |
| Center rudder | PGUP |
| Center throttle | PGDOWN |
Changing keyboard controls
Starting with Rigs of Rods version 2021.10, it is now possible to remap keyboard controls in-game. Just press the Controls button on the main menu:
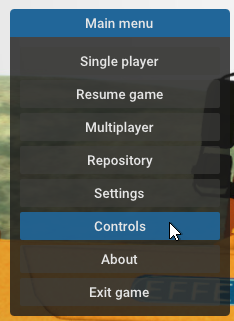
From here it's pretty self-explanatory, just select which control you want to change and press the new key.
Notes
-
Some common vehicle controls can be found the "Common" category. One example is the key to secure loads, found in the Common category with the label
COMMON_SECURE_LOAD. -
The menu currently only supports remapping keyboard controls. Remapping other input devices (controllers, steering wheels, joysticks, etc) still have to be done manually. Please see Configuring controls with the Input Mapping Tool.
Config file 'input.map'
This file defines all key alias for RoR, located at Documents\My Games\Rigs of Rods\config (Windows) or ~/.rigsofrods/config (Linux) by default. It has the following format:
EVENT_NAME EVENT_TYPE MAPPING
For example:
BOAT_CENTER_RUDDER Keyboard DOWN
This binds the BOAT_CENTER_RUDDER event to the Down arrow on your keyboard.
A list of all valid events can be found in the Keypress Events section.
Keyboard
For the keyboard there are several special things:
Modifiers
- CTRL
- SHIFT
- ALT
Combine them with a + sign. Example:
CAMERA_FREE_MODE Keyboard EXPL+SHIFT+C
The EXPL tag
A special keyword used in defining commands.
In this example, only COMMANDS_01 is triggered when pressing F1, and COMMANDS_13 is triggered when pressing CTRL+F1 (but not COMMANDS_01)
COMMANDS_01                    Keyboard             EXPL+F1
COMMANDS_13                    Keyboard             EXPL+CTRL+F1
In this example, COMMANDS_01 would be triggered if you press CTRL+F1, as F1 is part of the COMMANDS_13 combination.
COMMANDS_01                    Keyboard             F1
COMMANDS_13                    Keyboard             CTRL+F1
List of usable keys
0
1
2
3
4
5
6
7
8
9
A
ABNT_C1
ABNT_C2
ADD
APOSTROPHE
APPS
AT
AX
B
BACK
BACKSLASH
C
CALCULATOR
CAPITAL
COLON
COMMA
CONVERT
D
DECIMAL
DELETE
DIVIDE
DOWN
E
END
EQUALS
ESCAPE
F
F1
F10
F11
F12
F13
F14
F15
F2
F3
F4
F5
F6
F7
F8
F9
G
GRAVE
H
HOME
I
INSERT
J
K
KANA
KANJI
L
LBRACKET
LCONTROL
LEFT
LMENU
LSHIFT
LWIN
M
MAIL
MEDIASELECT
MEDIASTOP
MINUS
MULTIPLY
MUTE
MYCOMPUTER
N
NEXTTRACK
NOCONVERT
NUMLOCK
NUMPAD0
NUMPAD1
NUMPAD2
NUMPAD3
NUMPAD4
NUMPAD5
NUMPAD6
NUMPAD7
NUMPAD8
NUMPAD9
NUMPADCOMMA
NUMPADENTER
NUMPADEQUALS
O
OEM_102
P
PAUSE
PERIOD
PGDOWN
PGUP
PLAYPAUSE
POWER
PREVTRACK
Q
R
RBRACKET
RCONTROL
RETURN
RIGHT
RMENU
RSHIFT
RWIN
S
SCROLL
SEMICOLON
SLASH
SLEEP
SPACE
STOP
SUBTRACT
SYSRQ
T
TAB
U
UNDERLINE
UNLABELED
UP
V
VOLUMEDOWN
VOLUMEUP
W
WAKE
WEBBACK
WEBFAVORITES
WEBFORWARD
WEBHOME
WEBREFRESH
WEBSEARCH
WEBSTOP
X
Y
YEN
Z
Joystick, Wheel or gamepad
This category covers all analogue input devices detected by the operating system, so all gamepads, joysticks, wheels, pedals, etc.
JoystickButton
Arguments:
- Joystick Number (unused in modern mappings), set to 0
- Button number
AIRPLANE_THROTTLE_DOWN JoystickButton 0 2
JoystickAxis
Arguments:
- Joystick Number (unused in modern mappings), set to 0
- Axis number
- Options:
- HALF
- REVERSE
- UPPER
- LOWER
- RELATIVE
- DIGITAL
- DEADZONE : add deadzone in percent with equal sign: "DEADZONE=0.15".
- LINEARITY: add linearity in percent with equal sign: "LINEARITY=0.15".
AIRPLANE_STEER_RIGHT JoystickAxis 0 1 UPPER+DEADZONE = 0.15
JoystickPov
Arguments:
- Joystick Number (unused in modern mappings), set to 0
- POV number
- Direction: North, South, East, West, NorthEast, SouthEast, NorthWest, SouthWest.
CHARACTER_FORWARD JoystickPov 0 0 North
JoystickSlider, JoystickSliderX, JoystickSliderY
Arguments:
- Joystick Number (unused in modern mappings), set to 0
- Slider number
- Options:
- REVERSE
TRUCK_MANUAL_CLUTCH JoystickSliderY 0 Y 0 REVERSE+DEADZONE = -30
Keypress Events
These are all the valid keypress events as of version 2022.12, they can be used in a input map or for prop animations. Not all make sense though for animated props.
Common: Generic
| Event | Default keybinding | Description |
|---|---|---|
| COMMON_ACCELERATE_SIMULATION | CTRL+EQUALS | accelerate the simulation |
| COMMON_ACCELERATE_SIMULATION | CTRL+EQUALS | accelerate the simulation |
| COMMON_DECELERATE_SIMULATION | SHIFT+EQUALS | decelerate the simulation |
| COMMON_RESET_SIMULATION_PACE | BACKSLASH | reset the simulation pace |
| COMMON_OUTPUT_POSITION | H | write current position to log (you can open the logfile and reuse the position) |
| COMMON_QUIT_GAME | ESCAPE | exit the game |
| COMMON_QUICKLOAD | MULTIPLY | quickload scene |
| COMMON_QUICKSAVE | DIVIDE | quicksave scene |
| COMMON_SCREENSHOT | SYSRQ (Print Screen) | take a screenshot |
| COMMON_SCREENSHOT_BIG | CTRL+SYSRQ | take a big screenshot (3 times the screen size) |
| COMMON_TOGGLE_MAT_DEBUG | None | debug purpose - dont use |
| COMMON_TOGGLE_PHYSICS | J | enable or disable physics |
| COMMON_FOV_LESS | NUMPAD7 | decreases the current FOV value |
| COMMON_FOV_MORE | CTRL+NUMPAD7 | increase the current FOV value |
| COMMON_FOV_RESET | SHIFT+NUMPAD7 | reset the FOV value |
| COMMON_SAVE_TERRAIN | Keyboard ALT+SHIFT+CTRL+M | save the currently loaded terrain to a mesh file |
| COMMON_TOGGLE_TERRAIN_EDITOR | SHIFT+Y | toggle terrain editor |
| COMMON_FULLSCREEN_TOGGLE | ALT+RETURN | toggle between windowed and fullscreen mode |
Common: Actor interaction
| Event | Default keybinding | Description |
|---|---|---|
| COMMON_ENTER_OR_EXIT_TRUCK | RETURN | enter or exit a truck |
| COMMON_ENTER_NEXT_TRUCK | CTRL+RBRACKET | enter next truck |
| COMMON_ENTER_PREVIOUS_TRUCK | CTRL+LBRACKET | enter previous truck |
| COMMON_REMOVE_CURRENT_TRUCK | CTRL+DELETE | remove current truck |
| COMMON_TRUCK_REMOVE | CTRL+SHIFT+DELETE | delete current truck |
| COMMON_RESPAWN_LAST_TRUCK | CTRL+PERIOD | respawn last truck |
| COMMON_GET_NEW_VEHICLE | CTRL+G | get new vehicle |
| COMMON_PRESSURE_LESS | LBRACKET | decrease tire pressure (note: only very few trucks support this) |
| COMMON_PRESSURE_MORE | RBRACKET | increase tire pressure (note: only very few trucks support this) |
| COMMON_LOCK | L | connect hook node to a node in close proximity |
| COMMON_AUTOLOCK | ALT+L | unlock autolock hook node |
| COMMON_ROPELOCK | CTRL+L | connect a rope to a node in close proximity |
| COMMON_REPAIR_TRUCK | BACK | repair truck |
| COMMON_RESCUE_TRUCK | R | teleport to rescue truck |
| COMMON_RESET_TRUCK | I | reset truck to original starting position |
| COMMON_TOGGLE_RESET_MODE | APOSTROPHE | toggle reset mode |
| COMMON_SECURE_LOAD | O | tie a load to the truck |
| COMMON_TOGGLE_TRUCK_BEACONS | M | toggle truck beacons |
| COMMON_TOGGLE_TRUCK_LOW_BEAMS | N | toggle truck low beams |
| COMMON_CYCLE_TRUCK_LIGHTS | CTRL+N | cycle between light modes |
| COMMON_TOGGLE_TRUCK_HIGH_BEAMS | SHIFT+N | toggle truck high beams |
| COMMON_TOGGLE_TRUCK_FOG_LIGHTS | ALT+N | toggle truck fog lights |
| COMMON_TOGGLE_CUSTOM_PARTICLES | G | toggle particle cannon |
| COMMON_TOGGLE_REPLAY_MODE | CTRL+J | enable or disable replay mode |
| COMMON_REPLAY_FORWARD | RIGHT | more replay forward |
| COMMON_REPLAY_BACKWARD | LEFT | more replay backward |
| COMMON_REPLAY_FAST_FORWARD | SHIFT+RIGHT | move replay fast forward |
| COMMON_REPLAY_FAST_BACKWARD | SHIFT+LEFT | move replay fast backward |
Common: UI
| Event | Default keybinding | Description |
|---|---|---|
| COMMON_CONSOLE_TOGGLE | GRAVE | show / hide the console |
| COMMON_ENTER_CHATMODE | Y | enter the chat |
| COMMON_SEND_CHAT | RETURN | sends the entered text |
| COMMON_HIDE_GUI | U | hide all GUI elements |
| COMMON_TOGGLE_DASHBOARD | CTRL+U | display or hide the dashboard overlay |
| COMMON_TOGGLE_DEBUG_VIEW | K | toggle debug view |
| COMMON_CYCLE_DEBUG_VIEWS | CTRL+K | cycle debug views |
| COMMON_TRUCK_INFO | T | toggle truck HUD |
| COMMON_TRUCK_DESCRIPTION | CTRL+T | toggle truck description |
| COMMON_NETCHATDISPLAY | SHIFT+U | display or hide net chat |
| COMMON_NETCHATMODE | CTRL+U | toggle between net chat display modes |
| COMMON_TOGGLE_STATS | F | toggle Ogre statistics (FPS etc.) |
Common: Savegames
| Event | Default keybinding | Description |
|---|---|---|
| COMMON_QUICKSAVE_01 | ALT+CTRL+1 | save scene in slot 01 |
| COMMON_QUICKSAVE_02 | ALT+CTRL+2 | save scene in slot 02 |
| COMMON_QUICKSAVE_03 | ALT+CTRL+3 | save scene in slot 03 |
| COMMON_QUICKSAVE_04 | ALT+CTRL+4 | save scene in slot 04 |
| COMMON_QUICKSAVE_05 | ALT+CTRL+5 | save scene in slot 05 |
| COMMON_QUICKSAVE_06 | ALT+CTRL+6 | save scene in slot 06 |
| COMMON_QUICKSAVE_07 | ALT+CTRL+7 | save scene in slot 07 |
| COMMON_QUICKSAVE_08 | ALT+CTRL+8 | save scene in slot 08 |
| COMMON_QUICKSAVE_09 | ALT+CTRL+9 | save scene in slot 09 |
| COMMON_QUICKSAVE_10 | ALT+CTRL+0 | save scene in slot 10 |
| COMMON_QUICKLOAD_01 | ALT+1 | load scene from slot 01 |
| COMMON_QUICKLOAD_02 | ALT+2 | load scene from slot 02 |
| COMMON_QUICKLOAD_03 | ALT+3 | load scene from slot 03 |
| COMMON_QUICKLOAD_04 | ALT+4 | load scene from slot 04 |
| COMMON_QUICKLOAD_05 | ALT+5 | load scene from slot 05 |
| COMMON_QUICKLOAD_06 | ALT+6 | load scene from slot 06 |
| COMMON_QUICKLOAD_07 | ALT+7 | load scene from slot 07 |
| COMMON_QUICKLOAD_08 | ALT+8 | load scene from slot 08 |
| COMMON_QUICKLOAD_09 | ALT+9 | load scene from slot 09 |
| COMMON_QUICKLOAD_10 | ALT+0 | load scene from slot 10 |
Truck: Generic
| Event | Default keybinding | Description |
|---|---|---|
| TRUCK_ACCELERATE | UP | accelerate the truck |
| TRUCK_ACCELERATE_MODIFIER_25 | ALT+UP | accelerate with 25 percent pedal input |
| TRUCK_ACCELERATE_MODIFIER_50 | CTRL+UP | accelerate with 50 percent pedal input |
| TRUCK_BLINK_LEFT | COMMA | toggle left direction indicator (blinker) |
| TRUCK_BLINK_RIGHT | PERIOD | toggle right direction indicator (blinker) |
| TRUCK_BLINK_WARN | MINUS | toggle all direction indicators |
| TRUCK_BRAKE | DOWN | brake |
| TRUCK_BRAKE_MODIFIER_25 | ALT+DOWN | brake with 25 percent pedal input |
| TRUCK_BRAKE_MODIFIER_50 | CTRL+DOWN | brake with 50 percent pedal input |
| TRUCK_HORN | H | truck horn |
| TRUCK_LIGHTTOGGLE1 | CTRL+1 | toggle custom light 1 |
| TRUCK_LIGHTTOGGLE2 | CTRL+2 | toggle custom light 2 |
| TRUCK_LIGHTTOGGLE3 | CTRL+3 | toggle custom light 3 |
| TRUCK_LIGHTTOGGLE4 | CTRL+4 | toggle custom light 4 |
| TRUCK_LIGHTTOGGLE5 | CTRL+5 | toggle custom light 5 |
| TRUCK_LIGHTTOGGLE6 | CTRL+6 | toggle custom light 6 |
| TRUCK_LIGHTTOGGLE7 | CTRL+7 | toggle custom light 7 |
| TRUCK_LIGHTTOGGLE8 | CTRL+8 | toggle custom light 8 |
| TRUCK_LIGHTTOGGLE9 | CTRL+9 | toggle custom light 9 |
| TRUCK_LIGHTTOGGLE10 | CTRL+0 | toggle custom light 10 |
| TRUCK_PARKING_BRAKE | P | toggle parking brake |
| TRUCK_TRAILER_PARKING_BRAKE | CTRL+P | toggle trailer parking brake |
| TRUCK_ANTILOCK_BRAKE | SHIFT+B | toggle antilock brake |
| TRUCK_TOGGLE_VIDEOCAMERA | CTRL+V | toggle videocamera |
| TRUCK_TRACTION_CONTROL | SHIFT+T | toggle traction control |
| TRUCK_CRUISE_CONTROL | SPACE | toggle cruise control |
| TRUCK_CRUISE_CONTROL_READJUST | CTRL+SPACE | match target speed / rpm with current truck speed / rpm |
| TRUCK_CRUISE_CONTROL_ACCL | CTRL+R | increase target speed / rpm |
| TRUCK_CRUISE_CONTROL_DECL | CTRL+F | decrease target speed / rpm |
| TRUCK_STARTER | S | hold to start the engine |
| TRUCK_STEER_LEFT | LEFT | steer left |
| TRUCK_STEER_RIGHT | RIGHT | steer right |
| TRUCK_TOGGLE_CONTACT | X | toggle ignition |
| TRUCK_TOGGLE_FORWARDCOMMANDS | CTRL+SHIFT+F | toggle forwardcommands |
| TRUCK_TOGGLE_IMPORTCOMMANDS | CTRL+SHIFT+I | toggle importcommands |
| TRUCK_TOGGLE_PHYSICS | END | toggle physics |
| TRUCK_TOGGLE_INTER_AXLE_DIFF | ALT+W | cycle between available inter axle differential modes |
| TRUCK_TOGGLE_INTER_WHEEL_DIFF | W | cycle between available inter wheel differential modes |
| TRUCK_TOGGLE_TCASE_4WD_MODE | CTRL+W | toggle transfer case mode |
| TRUCK_TOGGLE_TCASE_GEAR_RATIO | SHIFT+W | toggle transfer case gear ratio |
| TRUCK_LEFT_MIRROR_LEFT | SEMICOLON | move left mirror to the left |
| TRUCK_LEFT_MIRROR_RIGHT | CTRL+SEMICOLON | move left mirror to the right |
| TRUCK_RIGHT_MIRROR_LEFT | COLON | more right mirror to the left |
| TRUCK_RIGHT_MIRROR_RIGHT | CTRL+COLON | move right mirror to the right |
Truck: Transmission
| Event | Default keybinding | Description |
|---|---|---|
| TRUCK_AUTOSHIFT_DOWN | PGDOWN | shift automatic transmission one gear down |
| TRUCK_AUTOSHIFT_UP | PGUP | shift automatic transmission one gear up |
| TRUCK_MANUAL_CLUTCH | LSHIFT | manual clutch (for manual transmission) |
| TRUCK_SHIFT_DOWN | Z | shift one gear down in manual transmission mode |
| TRUCK_SHIFT_NEUTRAL | D | shift to neutral gear in manual transmission mode |
| TRUCK_SHIFT_UP | A | shift one gear up in manual transmission mode |
| TRUCK_SHIFT_GEAR_REVERSE | N/A | shift directly to reverse gear |
| TRUCK_SHIFT_GEAR1 | N/A | shift directly to first gear |
| TRUCK_SHIFT_GEAR2 | N/A | shift directly to second gear |
| TRUCK_SHIFT_GEAR3 | N/A | shift directly to third gear |
| TRUCK_SHIFT_GEAR4 | N/A | shift directly to fourth gear |
| TRUCK_SHIFT_GEAR5 | N/A | shift directly to 5th gear |
| TRUCK_SHIFT_GEAR6 | N/A | shift directly to 6th gear |
| TRUCK_SHIFT_GEAR7 | N/A | shift directly to 7th gear |
| TRUCK_SHIFT_GEAR8 | N/A | shift directly to 8th gear |
| TRUCK_SHIFT_GEAR9 | N/A | shift directly to 9th gear |
| TRUCK_SHIFT_GEAR10 | N/A | shift directly to 10th gear |
| TRUCK_SHIFT_GEAR11 | N/A | shift directly to 11th gear |
| TRUCK_SHIFT_GEAR12 | N/A | shift directly to 12th gear |
| TRUCK_SHIFT_GEAR13 | N/A | shift directly to 13th gear |
| TRUCK_SHIFT_GEAR14 | N/A | shift directly to 14th gear |
| TRUCK_SHIFT_GEAR15 | N/A | shift directly to 15th gear |
| TRUCK_SHIFT_GEAR16 | N/A | shift directly to 16th gear |
| TRUCK_SHIFT_GEAR17 | N/A | shift directly to 17th gear |
| TRUCK_SHIFT_GEAR18 | N/A | shift directly to 18th gear |
| TRUCK_SHIFT_LOWRANGE | N/A | sets low range (1-6) for H-shaft |
| TRUCK_SHIFT_MIDRANGE | N/A | sets middle range (7-12) for H-shaft |
| TRUCK_SHIFT_HIGHRANGE | N/A | sets high range (13-18) for H-shaft |
| TRUCK_CYCLE_GEAR_RANGES | N/A | toggle between low/middle/high gear ranges |
| TRUCK_SWITCH_SHIFT_MODES | Q | toggle between transmission modes |
Airplane
| Event | Default keybinding | Description |
|---|---|---|
| AIRPLANE_STEER_RIGHT | RIGHT | steer right |
| AIRPLANE_BRAKE | B | normal brake for an aircraft |
| AIRPLANE_ELEVATOR_DOWN | DOWN | pull the elevator down in an aircraft. |
| AIRPLANE_ELEVATOR_UP | UP | pull the elevator up in an aircraft. |
| AIRPLANE_FLAPS_FULL | CTRL+2 | full flaps in an aircraft. |
| AIRPLANE_FLAPS_LESS | 1 | one step less flaps. |
| AIRPLANE_FLAPS_MORE | 2 | one step more flaps. |
| AIRPLANE_FLAPS_NONE | CTRL+1 | no flaps. |
| AIRPLANE_PARKING_BRAKE | P | airplane parking brake. |
| AIRPLANE_REVERSE | R | reverse the turboprops |
| AIRPLANE_RUDDER_LEFT | Z | rudder left |
| AIRPLANE_RUDDER_RIGHT | X | rudder right |
| AIRPLANE_STEER_LEFT | LEFT | steer left |
| AIRPLANE_STEER_RIGHT | RIGHT | steer right |
| AIRPLANE_THROTTLE_AXIS N/A | throttle axis. Only use this if you have fitting hardware :) (i.e. a Slider) | |
| AIRPLANE_THROTTLE_DOWN | PGDOWN | decreases the airplane thrust |
| AIRPLANE_THROTTLE_FULL | CTRL+PGUP | full thrust |
| AIRPLANE_THROTTLE_NO | CTRL+PGDOWN | no thrust |
| AIRPLANE_THROTTLE_UP | PGUP | increase the airplane thrust |
| AIRPLANE_TOGGLE_ENGINES | CTRL+HOME | switch all engines on / off |
| AIRPLANE_AIRBRAKES_NONE | CTRL+3 | no airbrakes |
| AIRPLANE_AIRBRAKES_FULL | CTRL+4 | full airbrakes |
| AIRPLANE_AIRBRAKES_LESS | 3 | less airbrakes |
| AIRPLANE_AIRBRAKES_MORE | 4 | more airbrakes |
| AIRPLANE_THROTTLE | N/A | airplane throttle |
Boat
| Event | Default keybinding | Description |
|---|---|---|
| BOAT_CENTER_RUDDER | PGDOWN | center the rudder |
| BOAT_REVERSE | PGUP | no thrust |
| BOAT_STEER_LEFT | LEFT | steer left a step |
| BOAT_STEER_LEFT_AXIS | N/A | steer left (analog value!) |
| BOAT_STEER_RIGHT | RIGHT | steer right a step |
| BOAT_STEER_RIGHT_AXIS | N/A | steer right (analog value!) |
| BOAT_THROTTLE_AXIS | N/A | throttle axis. Only use this if you have fitting hardware :) (i.e. a Slider) |
| BOAT_THROTTLE_DOWN | DOWN | decrease throttle |
| BOAT_THROTTLE_UP | UP | increase throttle |
Commands
| Event | Default keybinding | Description |
|---|---|---|
| COMMANDS_01 | F1 | Command 1 |
| COMMANDS_02 | F2 | Command 2 |
| COMMANDS_03 | F3 | Command 3 |
| COMMANDS_04 | F4 | Command 4 |
| COMMANDS_05 | F5 | Command 5 |
| COMMANDS_06 | F6 | Command 6 |
| COMMANDS_07 | F7 | Command 7 |
| COMMANDS_08 | F8 | Command 8 |
| COMMANDS_09 | F9 | Command 9 |
| COMMANDS_10 | F10 | Command 10 |
| COMMANDS_11 | F11 | Command 11 |
| COMMANDS_12 | F12 | Command 12 |
| COMMANDS_13 | CTRL+F1 | Command 13 |
| COMMANDS_14 | CTRL+F2 | Command 14 |
| COMMANDS_15 | CTRL+F3 | Command 15 |
| COMMANDS_16 | CTRL+F4 | Command 16 |
| COMMANDS_17 | CTRL+F5 | Command 17 |
| COMMANDS_18 | CTRL+F6 | Command 18 |
| COMMANDS_19 | CTRL+F7 | Command 19 |
| COMMANDS_20 | CTRL+F8 | Command 20 |
| COMMANDS_21 | CTRL+F9 | Command 21 |
| COMMANDS_22 | CTRL+F10 | Command 22 |
| COMMANDS_23 | CTRL+F11 | Command 23 |
| COMMANDS_24 | CTRL+F12 | Command 24 |
| COMMANDS_25 | SHIFT+F1 | Command 25 |
| COMMANDS_26 | SHIFT+F2 | Command 26 |
| COMMANDS_27 | SHIFT+F3 | Command 27 |
| COMMANDS_28 | SHIFT+F4 | Command 28 |
| COMMANDS_29 | SHIFT+F5 | Command 29 |
| COMMANDS_30 | SHIFT+F6 | Command 30 |
| COMMANDS_31 | SHIFT+F7 | Command 31 |
| COMMANDS_32 | SHIFT+F8 | Command 32 |
| COMMANDS_33 | SHIFT+F9 | Command 33 |
| COMMANDS_34 | SHIFT+F10 | Command 34 |
| COMMANDS_35 | SHIFT+F11 | Command 35 |
| COMMANDS_36 | SHIFT+F12 | Command 36 |
| COMMANDS_37 | ALT+F1 | Command 37 |
| COMMANDS_38 | ALT+F2 | Command 38 |
| COMMANDS_39 | ALT+F3 | Command 39 |
| COMMANDS_40 | ALT+F4 | Command 40 |
| COMMANDS_41 | ALT+F5 | Command 41 |
| COMMANDS_42 | ALT+F6 | Command 42 |
| COMMANDS_43 | ALT+F7 | Command 43 |
| COMMANDS_44 | ALT+F8 | Command 44 |
| COMMANDS_45 | ALT+F9 | Command 45 |
| COMMANDS_46 | ALT+F10 | Command 46 |
| COMMANDS_47 | ALT+F11 | Command 47 |
| COMMANDS_48 | ALT+F12 | Command 48 |
| COMMANDS_49 | CTRL+SHIFT+F1 | Command 49 |
| COMMANDS_50 | CTRL+SHIFT+F2 | Command 50 |
| COMMANDS_51 | CTRL+SHIFT+F3 | Command 51 |
| COMMANDS_52 | CTRL+SHIFT+F4 | Command 52 |
| COMMANDS_53 | CTRL+SHIFT+F5 | Command 53 |
| COMMANDS_54 | CTRL+SHIFT+F6 | Command 54 |
| COMMANDS_55 | CTRL+SHIFT+F7 | Command 55 |
| COMMANDS_56 | CTRL+SHIFT+F8 | Command 56 |
| COMMANDS_57 | CTRL+SHIFT+F9 | Command 57 |
| COMMANDS_58 | CTRL+SHIFT+F10 | Command 58 |
| COMMANDS_59 | CTRL+SHIFT+F11 | Command 59 |
| COMMANDS_60 | CTRL+SHIFT+F12 | Command 60 |
| COMMANDS_61 | CTRL+ALT+F1 | Command 61 |
| COMMANDS_62 | CTRL+ALT+F2 | Command 62 |
| COMMANDS_63 | CTRL+ALT+F3 | Command 63 |
| COMMANDS_64 | CTRL+ALT+F4 | Command 64 |
| COMMANDS_65 | CTRL+ALT+F5 | Command 65 |
| COMMANDS_66 | CTRL+ALT+F6 | Command 66 |
| COMMANDS_67 | CTRL+ALT+F7 | Command 67 |
| COMMANDS_68 | CTRL+ALT+F8 | Command 68 |
| COMMANDS_69 | CTRL+ALT+F9 | Command 69 |
| COMMANDS_70 | CTRL+ALT+F10 | Command 70 |
| COMMANDS_71 | CTRL+ALT+F11 | Command 71 |
| COMMANDS_72 | CTRL+ALT+F12 | Command 72 |
| COMMANDS_73 | CTRL+SHIFT+ALT+F1 | Command 73 |
| COMMANDS_74 | CTRL+SHIFT+ALT+F2 | Command 74 |
| COMMANDS_75 | CTRL+SHIFT+ALT+F3 | Command 75 |
| COMMANDS_76 | CTRL+SHIFT+ALT+F4 | Command 76 |
| COMMANDS_77 | CTRL+SHIFT+ALT+F5 | Command 77 |
| COMMANDS_78 | CTRL+SHIFT+ALT+F6 | Command 78 |
| COMMANDS_79 | CTRL+SHIFT+ALT+F7 | Command 79 |
| COMMANDS_80 | CTRL+SHIFT+ALT+F8 | Command 80 |
| COMMANDS_81 | CTRL+SHIFT+ALT+F9 | Command 81 |
| COMMANDS_82 | CTRL+SHIFT+ALT+F10 | Command 82 |
| COMMANDS_83 | CTRL+SHIFT+ALT+F11 | Command 83 |
| COMMANDS_84 | CTRL+SHIFT+ALT+F12 | Command 84 |
Character
| Event | Default keybinding | Description |
|---|---|---|
| CHARACTER_BACKWARDS | S | step backwards with the character |
| CHARACTER_FORWARD | W | step forward with the character |
| CHARACTER_JUMP | SPACE | let the character jump |
| CHARACTER_LEFT | LEFT | rotate character left |
| CHARACTER_RIGHT | RIGHT | rotate character right |
| CHARACTER_RUN | SHIFT+W | let the character run |
| CHARACTER_SIDESTEP_LEFT | A | sidestep to the left |
| CHARACTER_SIDESTEP_RIGHT | D | sidestep to the right |
| CHARACTER_ROT_UP | UP | rotate view up |
| CHARACTER_ROT_DOWN | DOWN | rotate view down |
Camera
| Event | Default keybinding | Description |
|---|---|---|
| CAMERA_CHANGE | C | change camera mode |
| CAMERA_LOOKBACK | NUMPAD1 | look back (toggles between normal and lookback) |
| CAMERA_RESET | NUMPAD5 | reset the camera position |
| CAMERA_ROTATE_DOWN | NUMPAD2 | rotate camera down |
| CAMERA_ROTATE_LEFT | NUMPAD4 | rotate camera left |
| CAMERA_ROTATE_RIGHT | NUMPAD6 | rotate camera right |
| CAMERA_ROTATE_UP | NUMPAD8 | rotate camera up |
| CAMERA_ZOOM_IN | NUMPAD9 | zoom camera in |
| CAMERA_ZOOM_IN_FAST | SHIFT+NUMPAD9 | zoom camera in faster |
| CAMERA_ZOOM_OUT | NUMPAD3 | zoom camera out |
| CAMERA_ZOOM_OUT_FAST | SHIFT+NUMPAD3 | zoom camera out faster |
| CAMERA_FREE_MODE_FIX | ALT+C | fix the camera to a position |
| CAMERA_FREE_MODE | SHIFT+C | enable / disable free camera mode |
| CAMERA_UP | Q | move camera up |
| CAMERA_DOWN | Z | move camera down |
Sky
| Event | Default keybinding | Description |
|---|---|---|
| SKY_DECREASE_TIME | SUBTRACT | decrease day-time |
| SKY_DECREASE_TIME_FAST | SHIFT+SUBTRACT | decrease day-time a lot faster |
| SKY_INCREASE_TIME | ADD | increase day-time |
| SKY_INCREASE_TIME_FAST | SHIFT+ADD | increase day-time a lot faster |
Grass (Unused)
| Event | Default keybinding | Description |
|---|---|---|
| GRASS_LESS | N/A | EXPERIMENTAL: remove some grass |
| GRASS_MORE | N/A | EXPERIMENTAL: add some grass |
| GRASS_MOST | N/A | EXPERIMENTAL: set maximum amount of grass |
| GRASS_NONE | N/A | EXPERIMENTAL: remove grass completely |
| GRASS_SAVE | N/A | EXPERIMENTAL: save changes to the grass density image |
Survey map
| Event | Default keybinding | Description |
|---|---|---|
| SURVEY_MAP_TOGGLE_ICONS | CTRL+SHIFT+ALT+TAB | toggle map icons |
| SURVEY_MAP_TOGGLE | CTRL+SHIFT+TAB | toggle map |
| SURVEY_MAP_CYCLE | TAB | cycle map modes |
| SURVEY_MAP_ZOOM_IN | CTRL+TAB | zoom in |
| SURVEY_MAP_ZOOM_OUT | SHIFT+TAB | zoom out |
Menu
| Event | Default keybinding | Description |
|---|---|---|
| MENU_DOWN | DOWN | select next element in current category |
| MENU_LEFT | LEFT | select previous category |
| MENU_RIGHT | RIGHT | select next category |
| MENU_SELECT | RETURN | select focused item and close menu |
| MENU_UP | UP | select previous element in current category |
Truck editing
| Event | Default keybinding | Description |
|---|---|---|
| TRUCKEDIT_RELOAD | SHIFT+CTRL+R | reload truck |
Road editing
| Event | Default keybinding | Description |
|---|---|---|
| ROAD_EDITOR_POINT_INSERT | INSERT | insert road point |
| ROAD_EDITOR_POINT_GOTO | G | go to road point |
| ROAD_EDITOR_POINT_SET_POS | M | set road point position |
| ROAD_EDITOR_POINT_DELETE | DELETE | delete road point |
| ROAD_EDITOR_REBUILD_MESH | B | regenerate road mesh |
Controllers
Xbox
Rigs of Rods supports Xbox 360 / One / Series controllers out of the box, just plug in your controller and play!
You can find a list of controls here.
If your Xbox controller does not work with RoR, please create a thread on the support forum or send a message in the #support channel on the official RoR Discord server.
PlayStation controller support using Steam
Currently, Rigs of Rods does not support PlayStation controllers. However, thanks to Steam's excellent input interface, it is possible to "disguise" your PlayStation controller as an Xbox controller, allowing it to work with the game.
This has been tested with a DualShock 4 controller, these instructions should also work with the DualSense (PS5) controller as well.
To begin, install Steam if you don't already have it and sign in.
You will first have to enable PlayStation controller support. Click Steam -> Settings 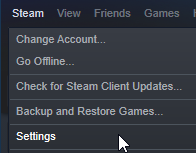
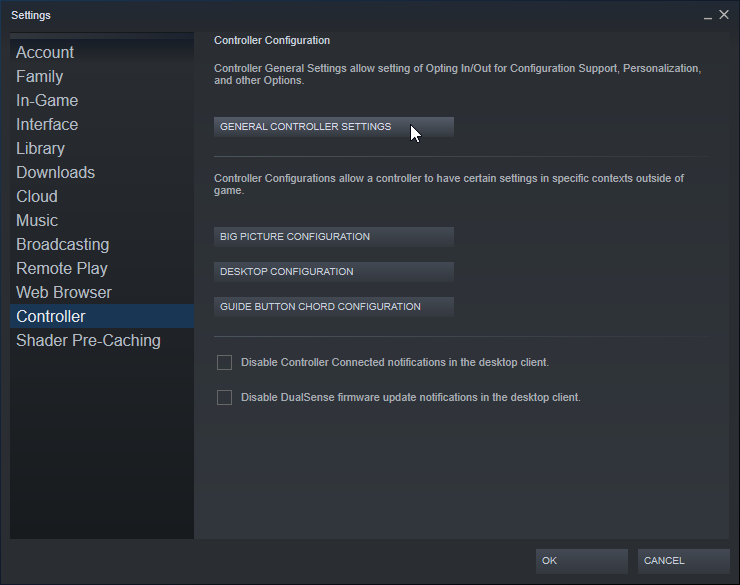
On the Controller tab, select General controller settings
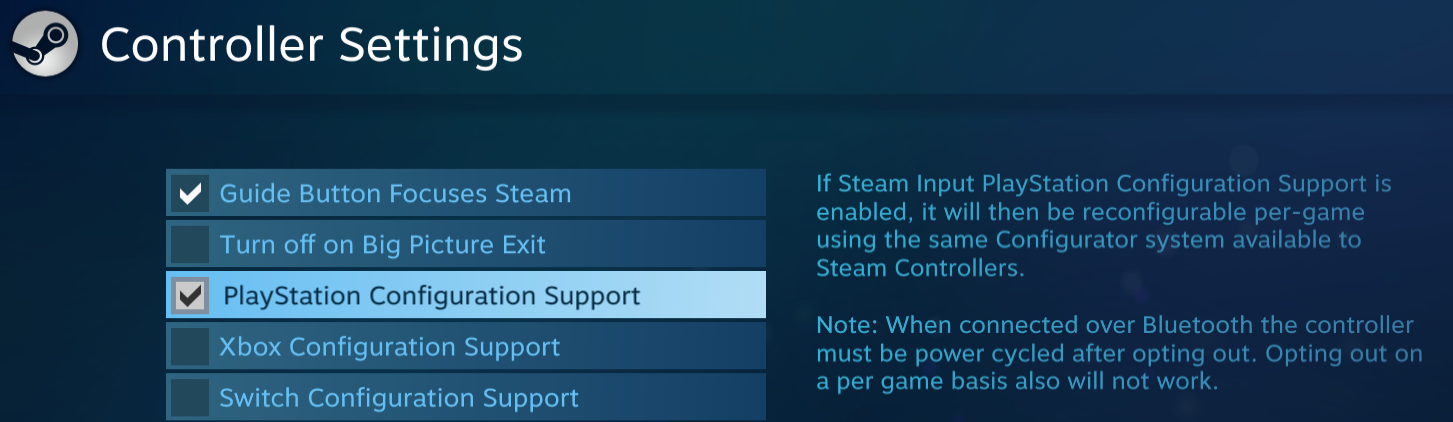
Enable PlayStation Configuration Support then click Back to return to the settings menu
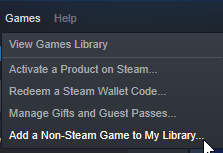
Next you'll have to add RoR as a non-Steam game. To do this click Games -> Add a Non-Steam Game to My Library...
Click 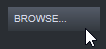 , locate where RoR is installed (usually
 C:\Program Files\Rigs of Rods) then double-click RoR.exe
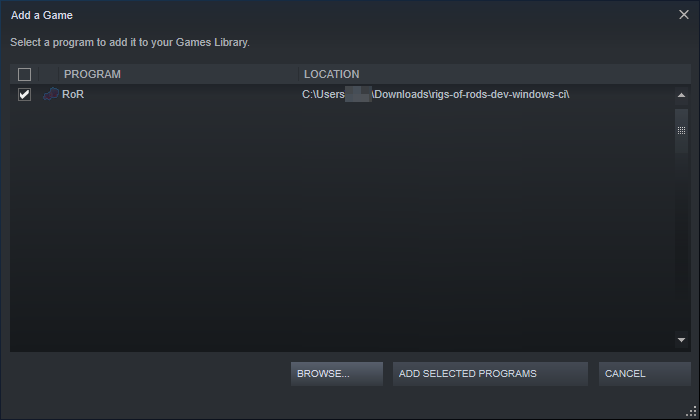
Finally, click Add selected programs. RoR will now be in your game library.
If you've done everything correctly, you should now be able to launch the game from Steam and your controller should be working!
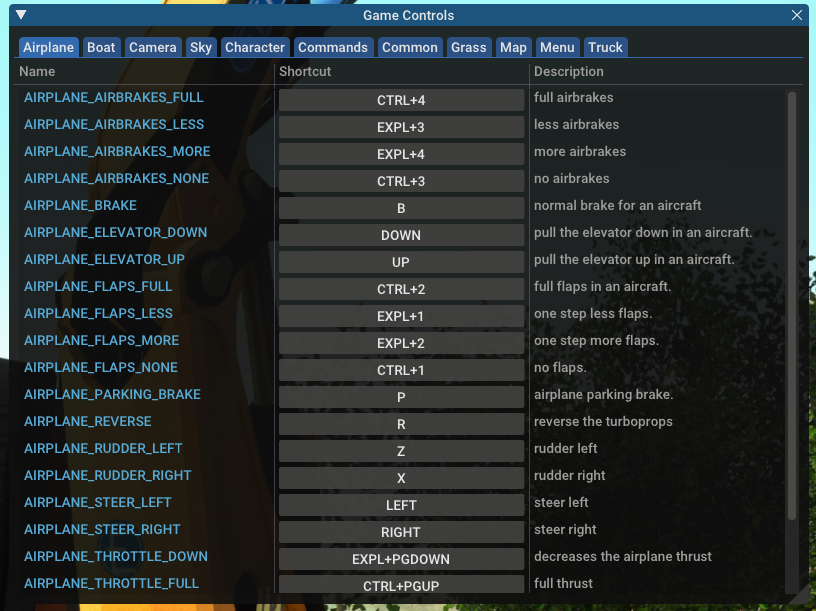
Controls are listed here.
If you wish to edit the controls, you can use Steam's UI by clicking "Controller layout" under the green play button (only shown when controller is connected).
For advanced editing you'll need to edit the Controller__XBOX_360_For_Windows_.map file inside the Rigs of Rods\config folder. See Config file 'input.map' for more info.
Mouse
Required applications
Setting up the input map and FreePIE script
After installing the above applications, download this zip file which contains the required input map and FreePIE script.
There will be two files in the zip: vJoy_Device.map and MouseControl.py.
Extract both files into Documents\My Games\Rigs of Rods\config.
Using FreePIE
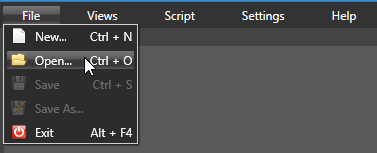
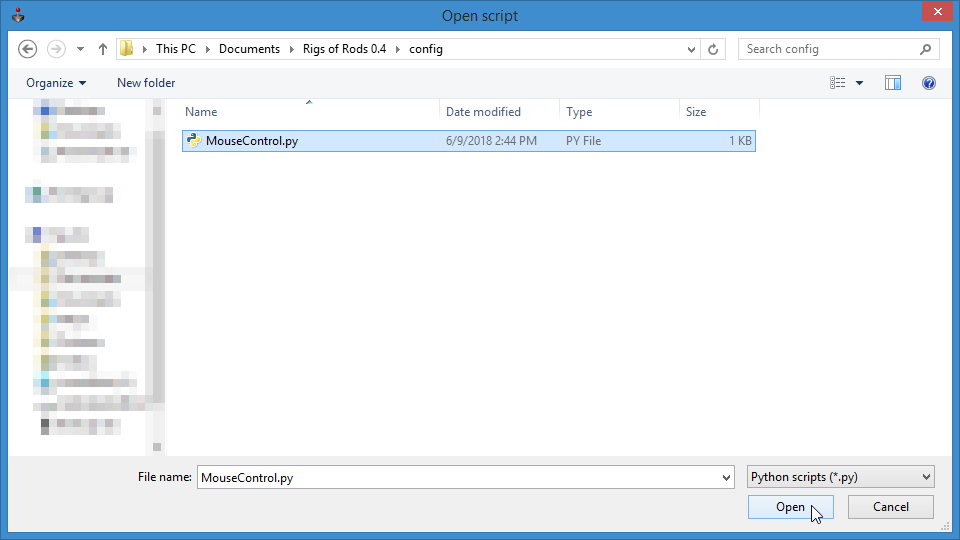
Open FreePIE and press File -> Open. Browse to the MouseControl.py file you downloaded earlier:
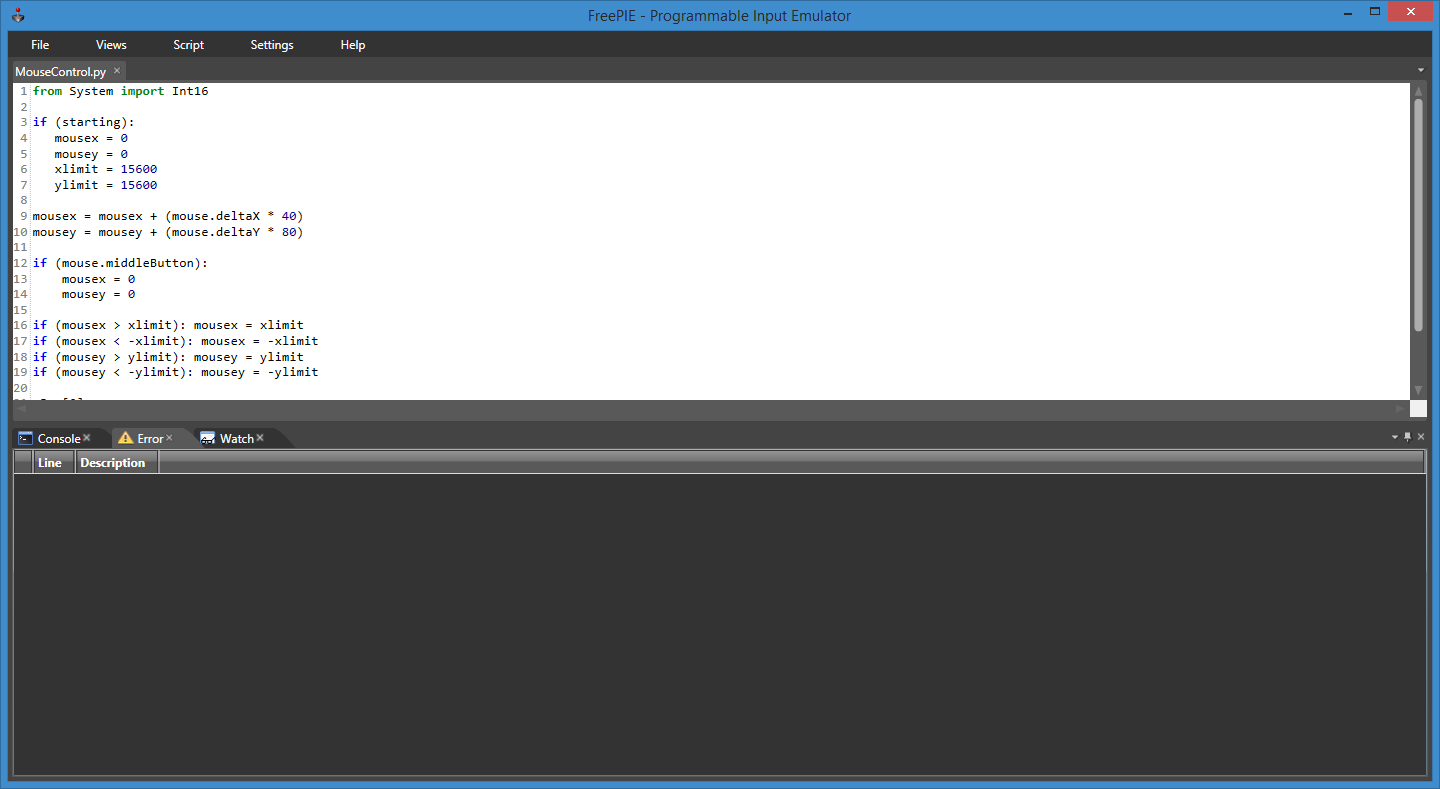
Then press Script -> Run script:

The script should now be running. If you get an error, install vJoy.
Leave FreePIE running, launch RoR and you should now have mouse control!
You can modify both the script and the input map to make them better suit for your use.
For example the numbers 40 and 80 in the script are the sensitivity of the controls.
Mouse middle button in the script above, will reset the axises in game, in this case the steering and throttle.
Configuring controls with the Input Mapping Tool
The easiest way to configure your device for use in Rigs of Rods is to use the Input Mapping Tool.
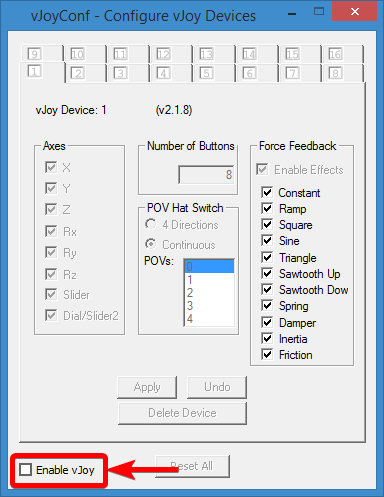
vJoy Conflicts
Note
If you have vJoy installed, you will have to disable it before running the tool!
Launching the tool
After downloading, extract the zip into a new folder. Then double-click Run.bat to launch the tool.
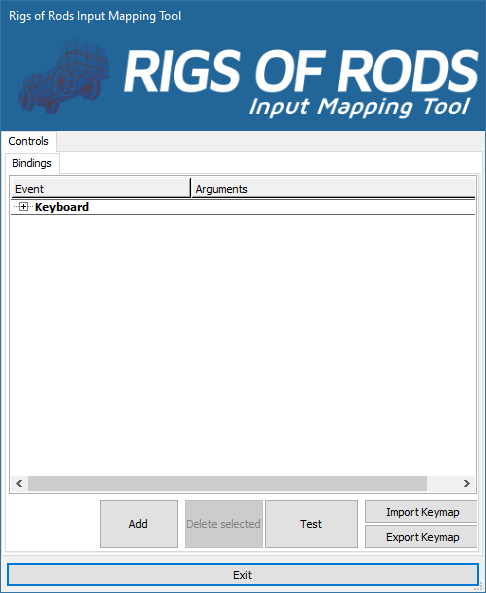
Adding new inputs
To begin adding inputs, click Add.
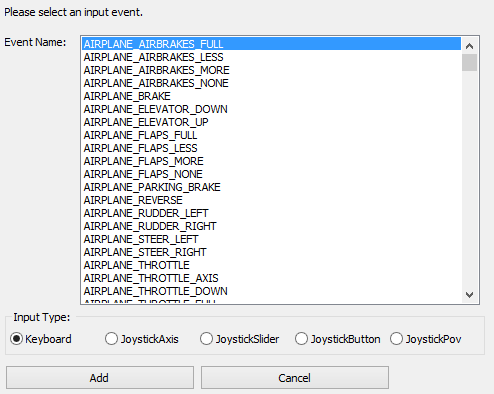
Select the event you want to assign an input to. In this example, I will use TRUCK_ACCELERATE
Then select the correct input type:
| Event type | Description |
| Keyboard | All keys on the keyboard. |
| JoystickAxis | Used for steering wheels/sticks/etc. |
| JoystickSlider | Any type of slider, mainly seen on flight sticks. |
| JoystickButton | Buttons! (e.g. `A` button on an Xbox controller) |
| JoystickPov | Used for D-Pad controls. |
Click Add once ready, the tool will then ask you to move the axis/press a button.
The popup will automatically close once the requested action is completed. If not, press Enter.
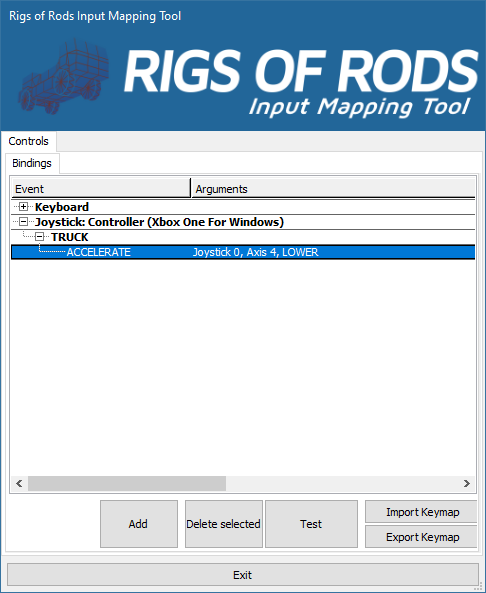
Repeat the process for all the inputs you want to add.
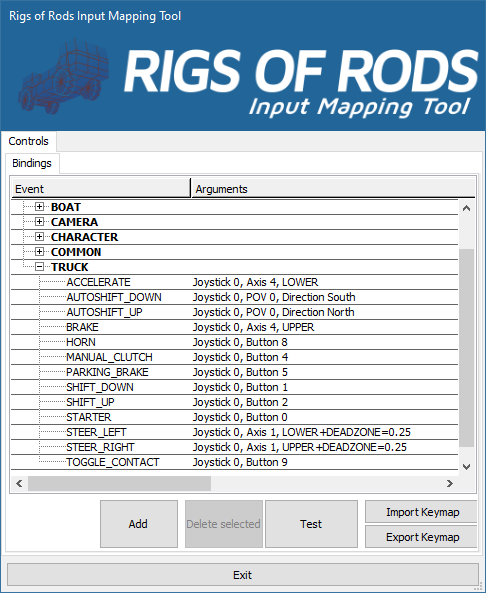
Once you're done, it's time to export the keymap.
Exporting the keymap
Note
The latest version of the Input Mapping Tool should automatically set the correct file name for your input device. If it doesn't, please see the troubleshooting section below.
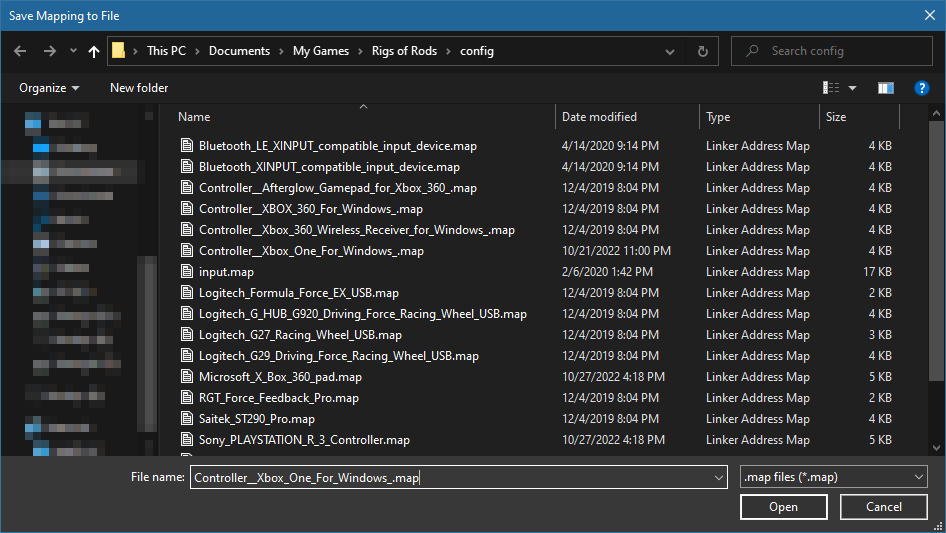
Click Export Keymap then select your device from the list.
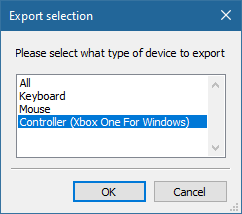
Browse to Documents\My Games\Rigs of Rods\config, then click Open to save the file.
And finally, run Rigs of Rods and test your device! If you wish to make further edits in the future, you can import your input map by clicking Import Keymap.
If you want to share your created input map, upload it to the Input Maps section of the Repository. Thanks!
Troubleshooting
If your input mapping isn't working in-game, you'll first want to check if the name of your input map file is correct.
To do this, you'll find a file named getdeviceinfo.exe in the same folder as the tool. Double-click it, a command prompt window will appear for a split second, this is normal. You will now see a inputinfo.txt file in the directory. Open the text file.
Example output:
System info:
    OIS Version: 1.3.0
    OIS Release Name: 1.3.0
    Input Manager: Win32InputManager
    Total Keyboards: 1
    Total Mice: 1
    Total JoySticks: 1

Devices:
    - OISKeyboard, Vendor: Win32InputManager
    - OISMouse, Vendor: Win32InputManager
    - OISJoyStick, Vendor: Controller (Xbox One For Windows)


Joystick 0:
    Vendor: Controller (Xbox One For Windows)
    VendorMapFilename: Controller__Xbox_One_For_Windows_.map
    ID: 0
    Type: [3] OISJoyStick
    Axes: 5
    Sliders: 0
    POV/HATs: 1
    Buttons: 16
    Vector3: 0
    Vector3Sensitivity: 2.28
VendorMapFilename will be the name of your exported file. In this example, the name will be Controller__Xbox_One_For_Windows_.map.
This is what you'll want to name your file. You can choose to just save your input map through the tool again or rename the file from File Explorer.
If you rename the file, it is highly recommended you enable file extensions (View -> File name extensions):

This is to help avoid you naming the file .map.map by mistake.
If you've made sure your input map is named correctly and the device still doesn't function in-game, please create a thread on the support forum or send a message in the #support channel on the official RoR Discord server.