Multiplayer server setup
Introduction
This tutorial will guide you through the process of setting up a Rigs of Rods multiplayer server.
Port forwarding
THIS STEP IS EXTREMELY IMPORTANT - FAILURE TO PORT FORWARD WILL RESULT IN YOUR SERVER TO NOT APPEAR ON THE SERVER LIST AND OTHER PLAYERS WILL NOT BE ABLE TO JOIN!
Before we begin, you MUST be able to forward the server port (TCP 12000 by default). This requires accessing your router's firewall settings.
Warning
All routers/ISPs are different, so just search for a tutorial for your router. A general port forwarding guide can be found here. If you're unable to figure it out, don't bother trying to host a server.
If you fail to port forward, the Cannot connect to master server error will appear on startup.
On Windows, you also may have to allow rorserver.exe through the firewall.
Got that? Great! Let's begin.
Windows
Requirements
- VS 2015-2022 Redistributable x64
- Text editor
- Router access for port forwarding
- Good internet connection speed
- A brain, basic computer knowledge, and patience
Download
Let's begin by downloading the latest Windows server release from here.
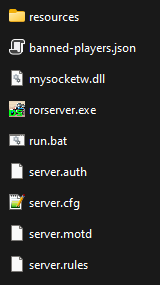
Extract the downloaded zip into a new folder:
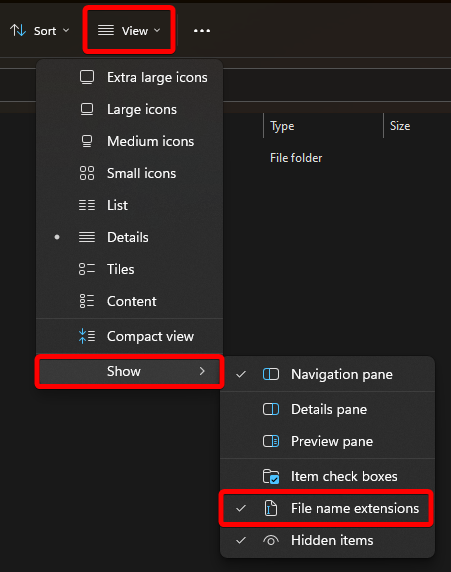
Tip
It is highly recommended to enable file extensions in File Explorer as this will make it easier to differentiate each config file.
Windows 10:

Windows 11:
server.cfg
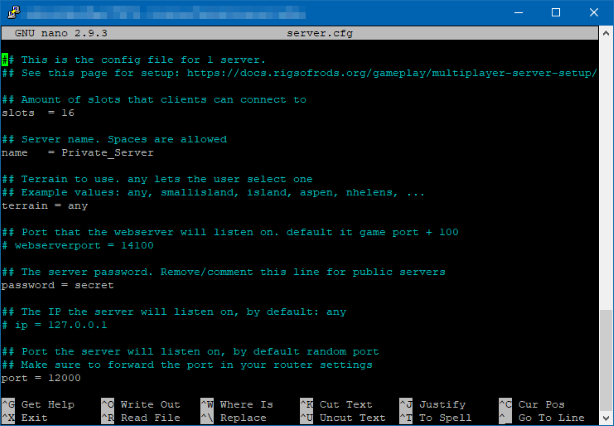
Inside the folder, open (server.cfg) with Notepad or your preferred text editor.
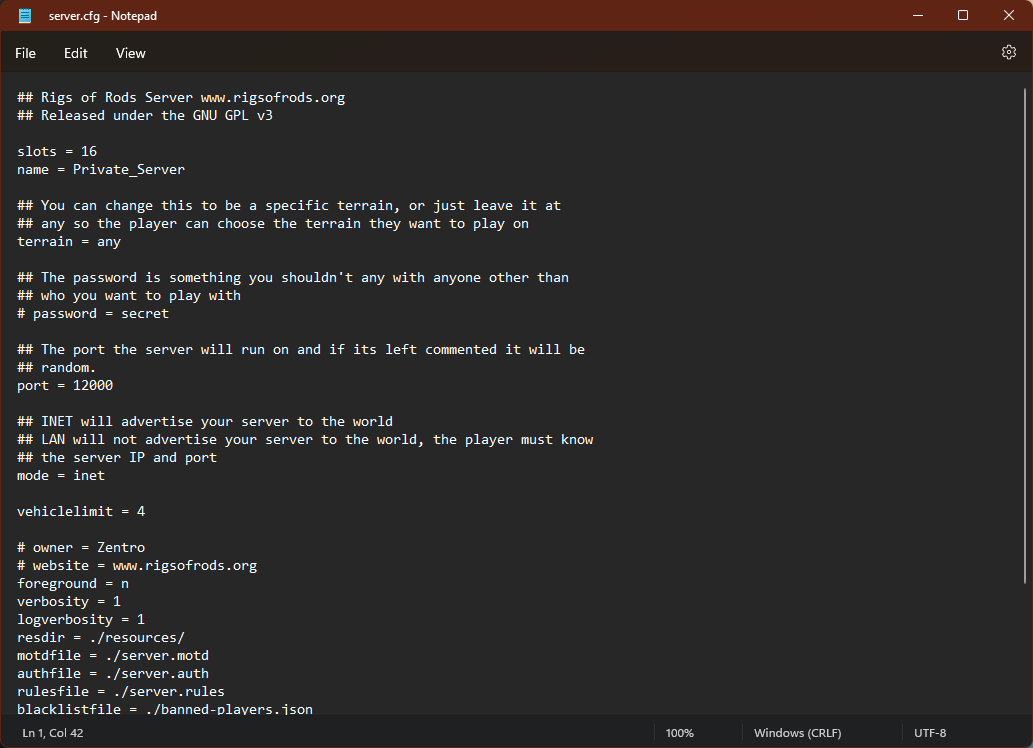
This is the main configuration file for your server. Each section contains a comment explaining what it does, pretty self-explanatory.
For simplicity's sake, you only need to change the name, terrain, port, and password lines.
Save and close the file once you're finished.
server.motd
This file sets your server's Message of the Day (MOTD), shown on server join:
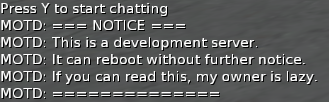
Fill it out with whatever you'd like.
server.rules
This file contains the rules for your server, shown by typing !rules.
Just as before, fill it out with rules you want players to follow.
server.auth
This file configures the admins and moderators on your server. Please see the UserAuth setup section for more information.
Running
Once you're finished configuring your server, double-click run.bat to launch the server:
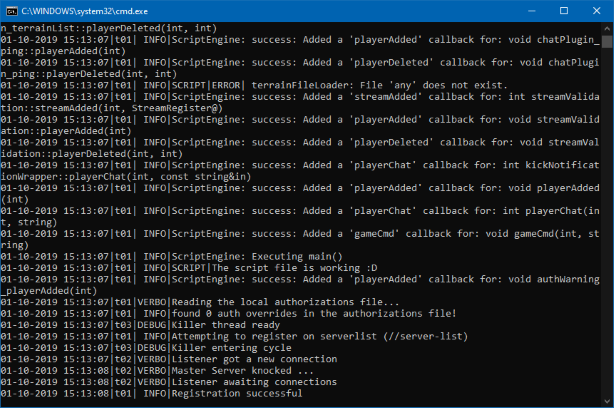
If successful, your server should now be running and registered on the server list!
Please see the troubleshooting section if you receive an error.
Linux
Download
I will assume you're running the server on a 64-bit VPS with SSH/FTP access and have unzip and nano installed.
Let's begin by downloading the latest Linux server release from here.
Upload the file to your VPS using an FTP client such as WinSCP or FileZilla.
Now SSH into your VPS and change to the directory where you uploaded the zip file.
Extract the zip with the following command:
unzip rorserver-2021.04-linux.zip -d rorserver
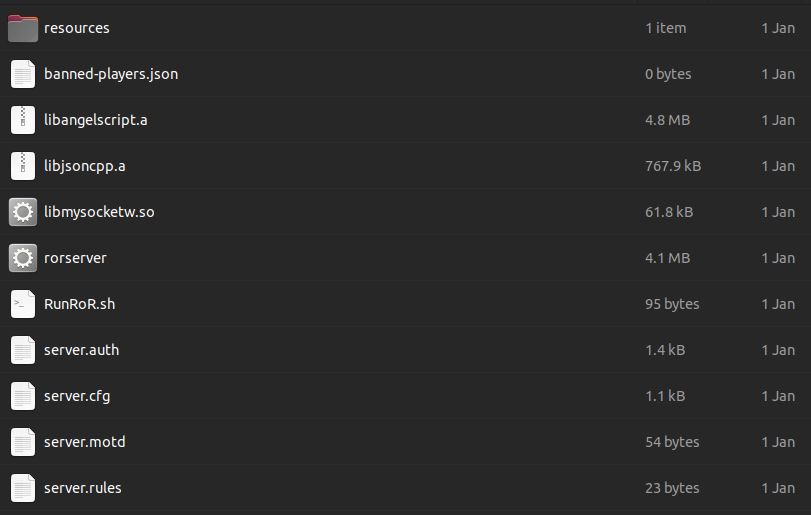
The server files should now be located in the rorserver folder:
server.cfg
In SSH, Go into the newly created rorserver folder and type nano server.cfg.
This is the main configuration file for your server.
Each section contains a comment explaining what it does, pretty self-explanatory.
For simplicity's sake, you only need to change the name, terrain, port, and password lines.
Once you're done, press CTRL+O to save the file and CTRL+X to exit.
server.motd
This file sets your server's Message of the Day (MOTD), shown on server join:
Fill it out with whatever you'd like.
server.rules
This file contains the rules for your server, shown by typing !rules.
Just as before, fill it out with rules you want players to follow.
server.auth
This file configures the admins and moderators on your server. Please see the UserAuth setup section for more information.
Running
Once you're finished configuring your server, start your server by running the following:
chmod +x rorserver
sh RunRoR.sh
chmod +x rorserver only needs to be run once to set permissions.
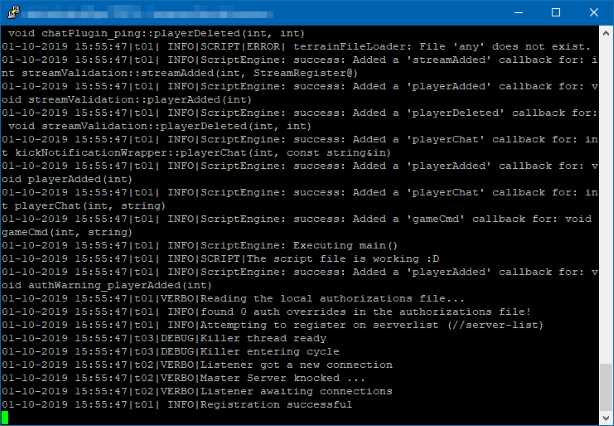
If successful, your server should now be running and registered on the server list!
Please see the troubleshooting section if you receive an error.
UserAuth setup
This section will teach you how to set up the server.auth file. This is used to define who is staff on your server.
Shut down your server before following these steps.
User token
First, you need to set a user token in your game's settings. To do this, please follow this tutorial.
server.auth
Open the server.auth file in a text editor. The contents should look like this:
; This files defines who is an admin, moderator etc on your server
; the syntax is as follows: <authorization> <token> <username (optional)>
;  - where authorization is a number between 1 and 13:
;       1: administrator (red name, has access to all admin functions)
;       4: moderator (red name, has access to all admin functions)
;       8: bot, robot (blue name, no special privileges)
;  - token is the user token of the user. It's the token that uniquely identifies the user, not the username.
;       This is not the normal token, but an encoded version of it.
;       You can get this token by starting your server, filling in your token
;       in your configurator and then look in the logfile for your encoded token.
;       A typical encoded token is exactly 40 characters long.
;  - username is the username that will be shown to other players
;       The username that the user fills in into their configurator will be overridden by this username.
;       If you do not specify a username, the username from the client's configurator will be used.
;
; note: You need to restart server after every edit to this file.
; note: Do not use spaces in the usernames
; note: Empty lines and lines starting with a ";" will be ignored.

; EXAMPLE ADMIN (replace these with your username and encoded token)
;1 9b3c463506f128319a0f16ef08d39d876ca25c68 admin_user
Start your server, join it and open the log file located at config/server.log. You should see a line similar to this:
INFO| New client: example_user (en_US), using RoR 0.4.7.0-dev-0ab5bca-dirty, with token 0EBB5A8B28053AB3CF63D4C59F0C1E04F28F01C9
0EBB5A8B28053AB3CF63D4C59F0C1E04F28F01C9 is the hashed token for the player, which is what you will set in your auth file.
If you want the player to be a admin, set the number to 1, or 4 if you want the player to be a moderator.
;example admin
1 0EBB5A8B28053AB3CF63D4C59F0C1E04F28F01C9 example_user
;example moderator
4 0EBB5A8B28053AB3CF63D4C59F0C1E04F28F01C9 example_user
Make sure to remove the comment (;) before the line.
Save the file and restart your server. If the server read the auth file correctly, it should log this:
INFO| found X auth overrides in the authorizations file!
The next time you join your server you should now have a red flag next to your name if you're a admin or a blue flag if you're a moderator.

Moderation commands
!list
Lists all players on a server with their UID.
!kick and !ban
Kicks or bans a player. Banned players are stored in banned-players.json which is loaded on server startup.
Usage: !kick UID reason or !ban UID reason
!say
Sends a message to a player using their UID or the entire server.
Usage: !say 10 message or !say -1 message
Troubleshooting
Many things can go wrong with your server, here's a small selection of problems that may occur:
Common error messages
Cannot connect to master server
By default, the server attempts to connect to the server list (master server) and will exit if the connection fails.
Registration failed, response code: HTTP 503, body: {"result":false,"message":"Could not connect to your server and verify it's version. Please check your Firewall or leave it as it is now to create a local only server. Your server is NOT advertised on the master server!
This happens when:
- You didn't forward the port correctly in your router's settings.
- You specified the wrong IP address in your server's config. If you don't know the correct IP address, then don't specify one. The server will search the correct IP address itself.
- Your firewall is blocking network access to the server.
If you do not want your server advertised on the server list and would rather have players join through the 'Direct IP' tab , change mode = inet to mode = lan in your server config.
Address already in use
FATAL Listerer: SWInetSocket::bind() error: Address already in use
The port that you filled in is already in use by another program. Please use another port number.
Failed to open authorization file
Couldn't open the local authorizations file ('/etc/rorserver/simple.auth'). No authorizations were loaded.
This means that the server failed to read your authorization file. Make sure your filename matches the one you specified and refer back to the UserAuth setup section.
If you didn't setup an authorization file, you can safely ignore this error message.
Connection issues
Server uses a different protocol version
Network fatal error: server uses a different protocol version
You need to download the correct game version to match your server version. The latest RoR version supports RoRNet 2.44.
The latest version may be downloaded from the homepage.
If you've come across a problem not listed here, please post in the appropriate support forum.