Heightmap RAW files
Outdated
This tutorial is from 2007, written for Blender version 2.43. It remains here as it contains some useful information.
A "heightmap", or "elevation map", is an image or binary file where every pixel/number represents world height at the given point. RoR supports 8-bit or 16-bit unsigned integer RAW heightmaps.
Making heightmaps in Blender
Blender is open source, cross platform, and free. You can also use it to generate meshes, truck and load files, someone who uses blender to make trucks is already familiar with the interface and can easily start making terrains. Plus blender can go into great detail with the terrain surface and allow the user to move individual modes at will. Blender can also export a 16bit grayscale image, which is required by RoR.
Requirements
Blender with EXR support (v2.43+ maybe earlier)
ImageMagick with EXR support (v6.3.4+)
Setting up the Environment
- Start up
blender, in Linux use the-wswitch to have blender use a managed window. - Press the (key|a) key to select all objects (all objects turn pink when selected)
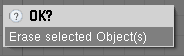
- Press the (key|x) key and a little dialog pops up under the cursor, click
Erase Selected Object(s)to erase all the objects.
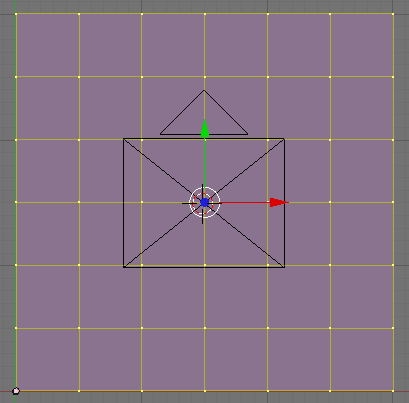
Add a Plane

- Press the (key|numpad 7) key to look at the xy plane.
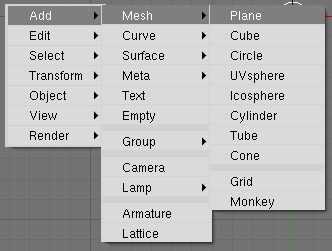
- Press the (key|spacebar) and in the menu that appears select
''Add''->''Mesh''->''Plane''
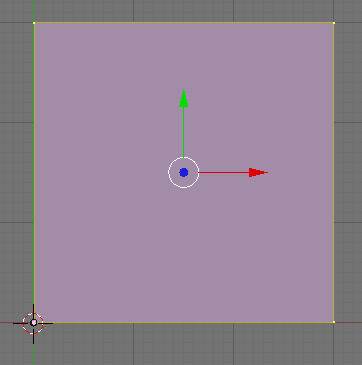
At this point you have a 2x2 BU (blender units) plane centered at 0,0,0 (see above image). What we want is a 3x3 BU plane centered at 1.5,1.5,0. this isn't needed but it sets up an easy conversion factor of 1BU = 1km. So when you look at the width on an edge a 0.001BU = 1 meter.
Scaling and moving the Plane
- make sure you are in
Edit Mode( ).
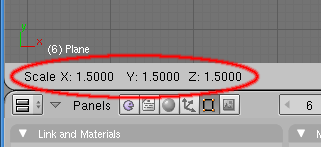
). - Press the (key|s) key to scale the plane, and hold down the the (key|ctrl) to snap to the grid.
- In the lower left hand area of the panel you'll see the scale factor, move the cursor until the scale factor is 1.5000. Holding down the (key|ctrl) key will snap the scale factor to 0.1 units at a time, making 1.5000 easy.
- Click the left mouse button ((key|lmb)) to make the scale change.
- Still holding (key|ctrl) click-and-drag the plane using the right mouse button ((key|rmb)) until the lower left hand corner of the plane is at the axis. This is where the red and green lines cross.
- Left click ((key|lmb)) to move the plane to it's new position.
Making the height Gradient
ok, now it gets trickier.
Add a Material

- Open the
MaterialPanel, to do this: ** click onshading** then the materials button - click on the
Add NewButton to add a new material - under the
materialtab click onShadelessbutton
Add a Texture
Texture Tab
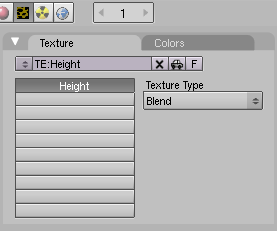
- Open the
TexturePanel- click on
shading - then the
texturebutton
- click on
- click on the
Add Newbutton to add a texture.- to change the name of the texture click on
Tex.001and type in a new name, in our caseheightwould be appropriate
- to change the name of the texture click on
- Next, select
Blendfrom theTexture Type"pulldown" menu.
Colors Tab
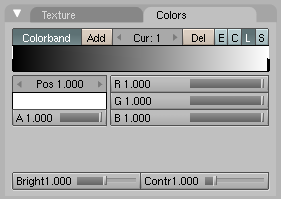
- Go under the color tab and click on the
Colorbandbutton. - There is a Field labeled
Awith a value of0.000, change the value to1.000 - Select the second color point by clicking on the white vertical band on the right of the colorband.
- change the color of the second colorpoint to white by making the
Rvalue1.000
Mapping the texture
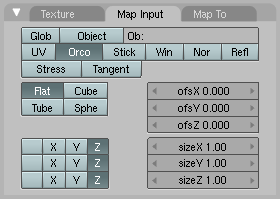
- Now go back to the Materials
- under the Texture Tab make sure there is a check next to the name of the texture you just added.
- go into the
Map Inputtab - in the lower left of this tab you'll see the mappings, select Z for all of mappings
Cricky this is taking a long time to write!! but at least the texture is done now.
Making the Camera

- Go back into
Object Mode( )
) - Under the View menu select
ViewselectView Properties - Under
3D Cursorchange thex,y,zvalues to1.50,1.50,5.00. - press
spacebarand selectAdd->Camera - hit (key|f9) or click the
editingbutton to and you'll see a camera tab. - click the
Orthographicbutton - change the value of scale to 3.00
Setting up the rendering

- press
f10to enter the scene panel - below the format tab change
SizeX, andSizeYto1025 - under that, there is a menu for the formats, it defaults
Jpeg. click on this pulldown and selectOpenEXR - select the
BWbutton below that
Phew!! good news is that at this point everything is basically set up! Save this file so you can use it as a starting point for future terrains.
For the lazy that just want to skip to this point here is a blender file saved at this point. Media:terntemplate.blend
Test Render
since everything is set up at this point lets do a test render. simply press f12 if a window pops up with some stats int he top with a gray image in the middle everything is working as it should.
Making Terrain
- Make sure you're in
Object Mode() - Right click on the plane you've created to select it
- Switch to
Edit Mode() - Press the

wkey and selectSubdivide Multifrom the menu - The value entered in this box determined how many subdivisions each side is cut up into. 5 is good for demo purposes. you should now have a plane that looks like this:
- rotate you're view by holding down the middle mouse button (
mmb) and moving the mouse. move the view to a point where you can easily distinguish all 3 axis.- Alternatively, you can rotate the view using the keypad numbers
numpad 4,numpad 8,numpad 3, andnumpad 2
- Alternatively, you can rotate the view using the keypad numbers
- Right click on a vertex (these are the pink dots) to select it.
- Then click-and-drag the blue array pointing, this is you're z axis and by doing this you move the selected nodes along that one axis.
- You should end up with a picture similar to this:

You now have a (Very) basic hill.
Generating the heightmap
Render the scene
- Press
f12to bring up the render window: - Now press
f3to bring up the save dialog, save this to a file with the extension of.exr. I saved it tomymap.exrfor this tutorial.
Instead of saving the image as .exr save it as .jpeg
Convert to raw format
Note: this process can vary depending on the platform.
- open a command line and navigate to where the saved
.exrfile is saved. - execute the following:
convert mymap.exr -depth 16 -size 1025x1025 -endian LSB gray:mymap.raw
- Setup the
.ternand.cfgas described in Terrain Formats.
whola! the resulting file is a usable heightmap for RoR.
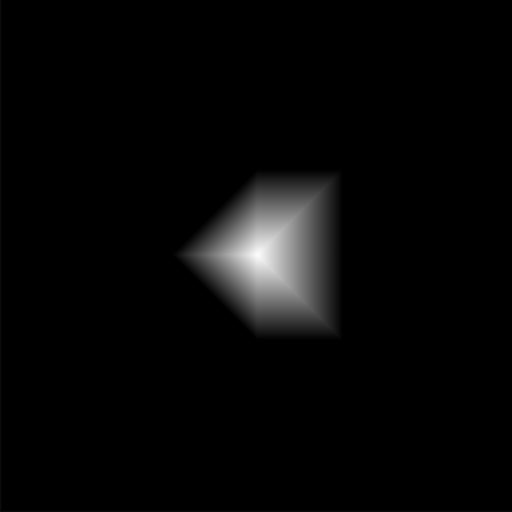
This is the resulting image for the heightmap, your's should look somewhat similar:
You don't have to do this if you saved the image as a .jpeg
you can import this in L3DT as a heightmap and export it as .raw
Refer to the L3DT tutorial for details on how to size and export
Where to go from here
Well there are all kinds of guides on making terrains, some tools for it too.
These are the resources I used to make this tutorial.
Creating a Heightmap from a Plane
Mountains Out Of Molehills
Making Landscapes with heightmaps
InnerWorld terrain generator
In particular if you want to learn more general blender I highly suggest reading the Blender 3D: Noob to Pro book on wikibook.
Troubleshooting
Heightmap isn't the proper size
Make sure the X and Y size of the render is 1025x1025.