Making alternate skins
This page serves as an overview page on how to create and modify custom skins.
Step-by-step guide
Step 1 - GUID
Skins are matched against vehicles via GUID (Globally-Unique-IDentifier).
Make sure the vehicle you want to skin has one: Truck file format - GUID
Ideally, all vehicles should have one. You might need to regen the cache, so the GUID will be in the cache as well.
It is recommended to generate a GUID using this site.
Step 2 - the .skin file
Create a file named "MySkinName.skin" (replace MySkinName with any string without spaces) with the following content:
Sarens Skin for Sennebogen 5500
{
    replaceTexture   = blansjaar41.jpg, blansjaar41_sarens.jpg
    preview          = 9c15cccf8a8dca392b84b7b778e3517139cef287.png
    description      = sarens skin for the sennebogen 5500
    authorName       = Rotexx
    AuthorID         = 39570
    GUID             = 90670430-695d-467b-8c91-dcb67a42633c
}
this skin was made by Rotexx whose Author ID is 39570. The preview image for the skin is 9c15cccf8a8dca392b84b7b778e3517139cef287.png.
There are 2 ways how to replace the original vehicle graphics with yours:
-
Image substitution - The simple one, you name an existing texture file and a replacement file. In this example, 'blansjaar41.jpg' is replaced with 'blansjaar41_sarens.jpg'. This only works with managedmaterials.
-
Material substitution - More complex, you need to know the .material file format of OGRE3D engine. For an example, see the "antonov" tutorial below. The principle is the same - you name the original material and then the new, replacement material.
Step 3 - the package
Put all the files into a zip archive named "sarens.skinzip" and put that into the packs folder (NOT .skinzip.zip, just .skinzip). The .skinzip is important, as it will force RoR to always load this zip to parse the skin information from it.
Step 4 - the game
Start the game and select the truck, it should have a valid GUID in the selection menu. When pressing enter, the skin selection GUI will be displayed.
Skin file reference
Sarens Skin for Sennebogen 5500
{
    // this is a comment line, it is ignored when parsing. It always starts with //
    // replaceTexture = <original_texture.png> <skin_texture.png>
    replaceTexture   = blansjaar41.jpg, blansjaar41_sarens.jpg
    replaceTexture   = blansjaarkleur.jpg, blansjaarkleur_sarens.jpg
    replaceTexture   = blansjaarlogo5500.jpg, blansjaarlogo5500_sarens.jpg
    // preview = <preview_image.png>
    preview          = 9c15cccf8a8dca392b84b7b778e3517139cef287.png
    // description = text that will show in the selectionWindow
    description      = sarens skin for the sennebogen 5500
    // AuthorName = <author name, no special characters>
    authorName       = Rotexx
    // AuthorID = <forum ID of the author>
    AuthorID         = 39570
    // GUID = <of the truck to which this skin fits>
    GUID             = 90670430-695d-467b-8c91-dcb67a42633c
}
replaceTexture - Defines the texture replacements, its first argument is the original texture name, the second argument is the texture name of the skin. Please note that those must be different, or you will get a file collision. You can use this line as much as you like. As noted earlier, this only works with managedmaterials.
preview - The "mini" image that will appear on the skin selector window.
description - A short description of the skin.
authorName - Your username.
AuthorID - Your forum ID. To get your ID, view your forum profile and check the number shown in the URL. For example:
https://forum.rigsofrods.org/members/curiousmike.5831/
5831 would be the ID.
GUID - The GUID that matches the GUID in the .truck file. See Step 1 - GUID.
Replacing OGRE Materials (.material)
If your vehicle uses a .material file for its textures, you will have to use replaceMaterial instead of replaceTexture.
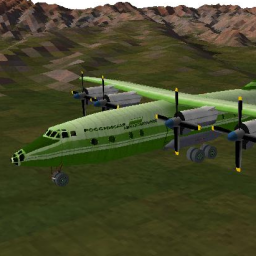
So for an example we will just do this now for the an-12.airplane.

Step 1 - The material
Copy the existing material file (5822UID-an-12.material) and change the material and texture name(s), like so:
material 5822UID-tracks/An12-Green
{
    technique
    {
        pass
        {
            scene_blend alpha_blend
            alpha_rejection greater 128
            texture_unit
            {
                texture 5822UID-an-12-green.dds
            }
        }
    }
}
Step 2 - The .skin file
To find out the original material name, open the An-12's zip file, open the .airplane file then find the globals section and note down the third argument: 5822UID-tracks/An12
Then create a simple .skin file to describe the skin:
Antonov 12 - Green Skin
{
    // The substitution: old material name, new material name
    replaceMaterial = 5822UID-tracks/An12, 5822UID-tracks/An12-Green
    // Preview image. Should be at least 256x256 pixels.
    preview          = an-12-green-skin-mini.png
    // Short description
    description      = Green skin for the An-12
    // Name of the author, optional
    AuthorName = Yourname
    // Forum ID of the author, optional
    AuthorID = 1
    // GUID (globally unique identifier), REQUIRED!
    GUID = ...GUID, see above...
}
This will replace the old material name (take the names from step 1) with the new material (from step 3)
If you want to replace more than one materials (for example for the props or anything else, just add lines with the correct format.
Step 3 - Packaging
Like above - package your skin files to .skinzip, and enjoy it ingame!
More examples
An example skin that replaces materials: 1982 DI Sportster Scheme: HotWheels Challenge
HotWheels Challenge Livery
{
    replaceTexture   = SportsCarUV.png, SportsCarUV_HWChallenge.png
    replaceTexture   = 308Wheel.png, 308Wheel_HWChallenge.png
    replaceTexture   = 308Wheel_S.png, 308Wheel_HWChallenge_S.png
    replaceTexture   = SportsCarMudflaps.png, SportsCarMudflaps_HWChallenge.png
    replaceTexture   = RallyLightsUV.png, RallyLightsUV_HWChallenge.png
    replaceTexture   = Sports_Wing_Red.png, Sports_Wing_HWChallenge.png
    replaceTexture   = SportsLeather.png, SportsLeather_Black.png
    replaceTexture   = SportsPlastic.png, SportsPlastic_HWChallenge.png
    replaceTexture   = PlasticSpec.png, PlasticSpec_HWChallenge.png
    replaceMaterial  = Sports_Speedo, Sports_Speedo_HW
    replaceMaterial  = Sports_Oil, Sports_Oil_HW
    replaceMaterial  = Sports_Glow_Blue, Sports_Glow_HW
    replaceMaterial  = Sports_Tacho, Sports_Tacho_HW
    replaceMaterial  = Sports_Needle, Sports_Needle_HW
    preview          = HotWheels_Challenge_Mini.png
    description      = HotWheels Challenge Scheme (Based on a particularly hot Ferrari 360 Modena...)
    authorName       = ShawnVallance
    AuthorID         = 5201995
    GUID             = DI_SPORTSCAR_GUID

}