Building rail vehicles
In this tutorial you will learn how to build a small locomotive and wagon. Apart from the meshbuilding, it covers everything needed to build a working train. All sizes must be exactly as shown in this tutorial!
What you need for this tutorial:
- Some basic knowledge of building objects for RoR
- A text editor, e.g. Notepad
- A visual editor for watching the node and beam structure
Please note that this train does not work as well as expected. Main reasons are the low mass of the train, the really short wheelbase and the fact that tires in RoR are not perfectly round. All this results in a quite bumpy ride.
Building a small locomotive
Step 1: Bogie
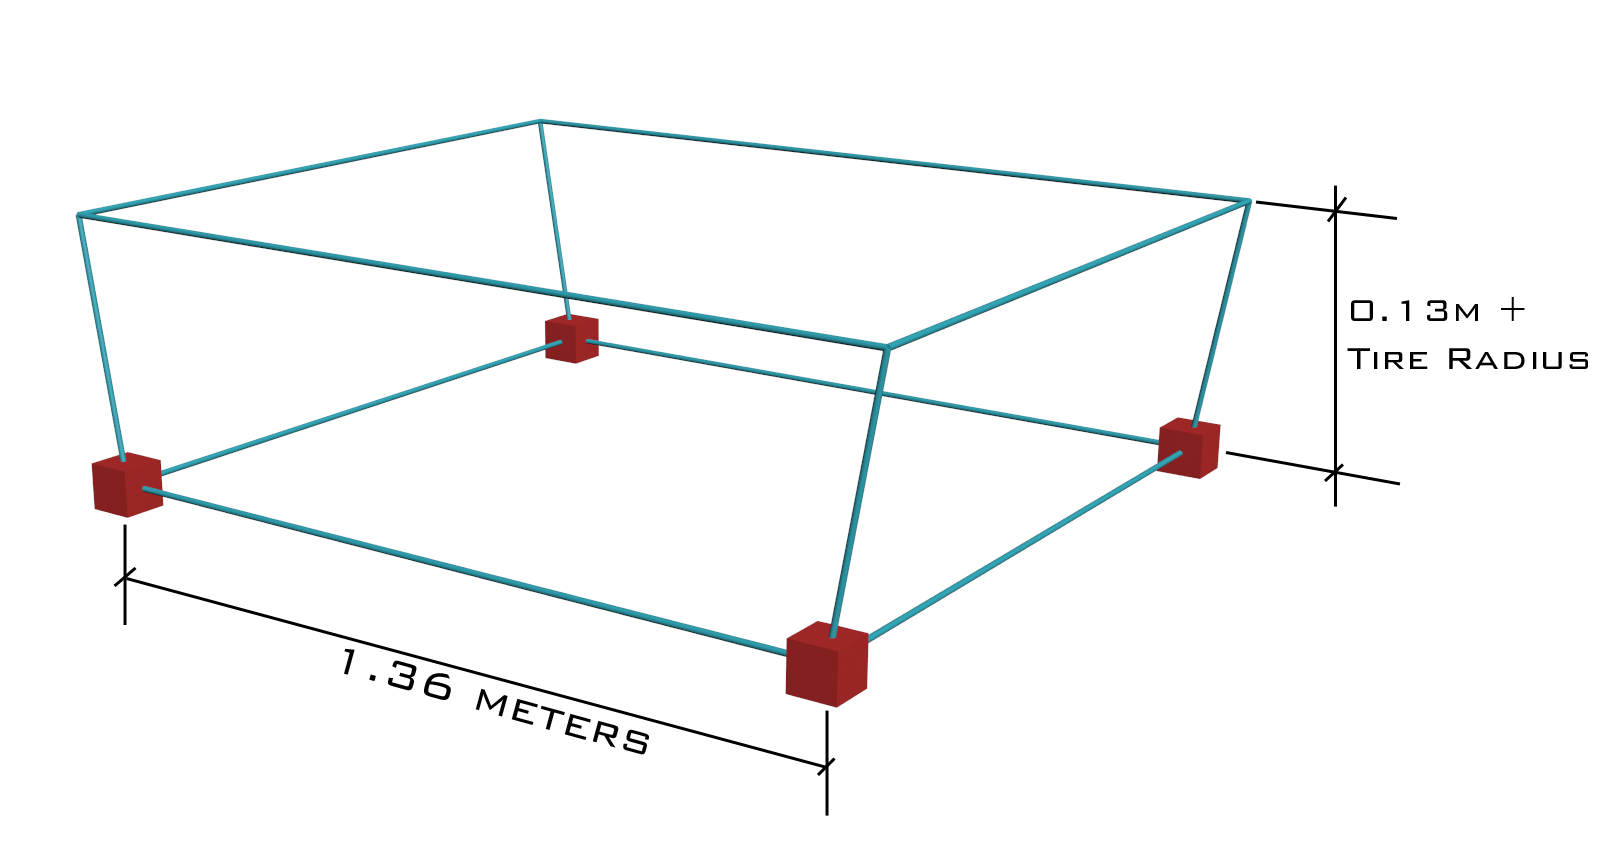
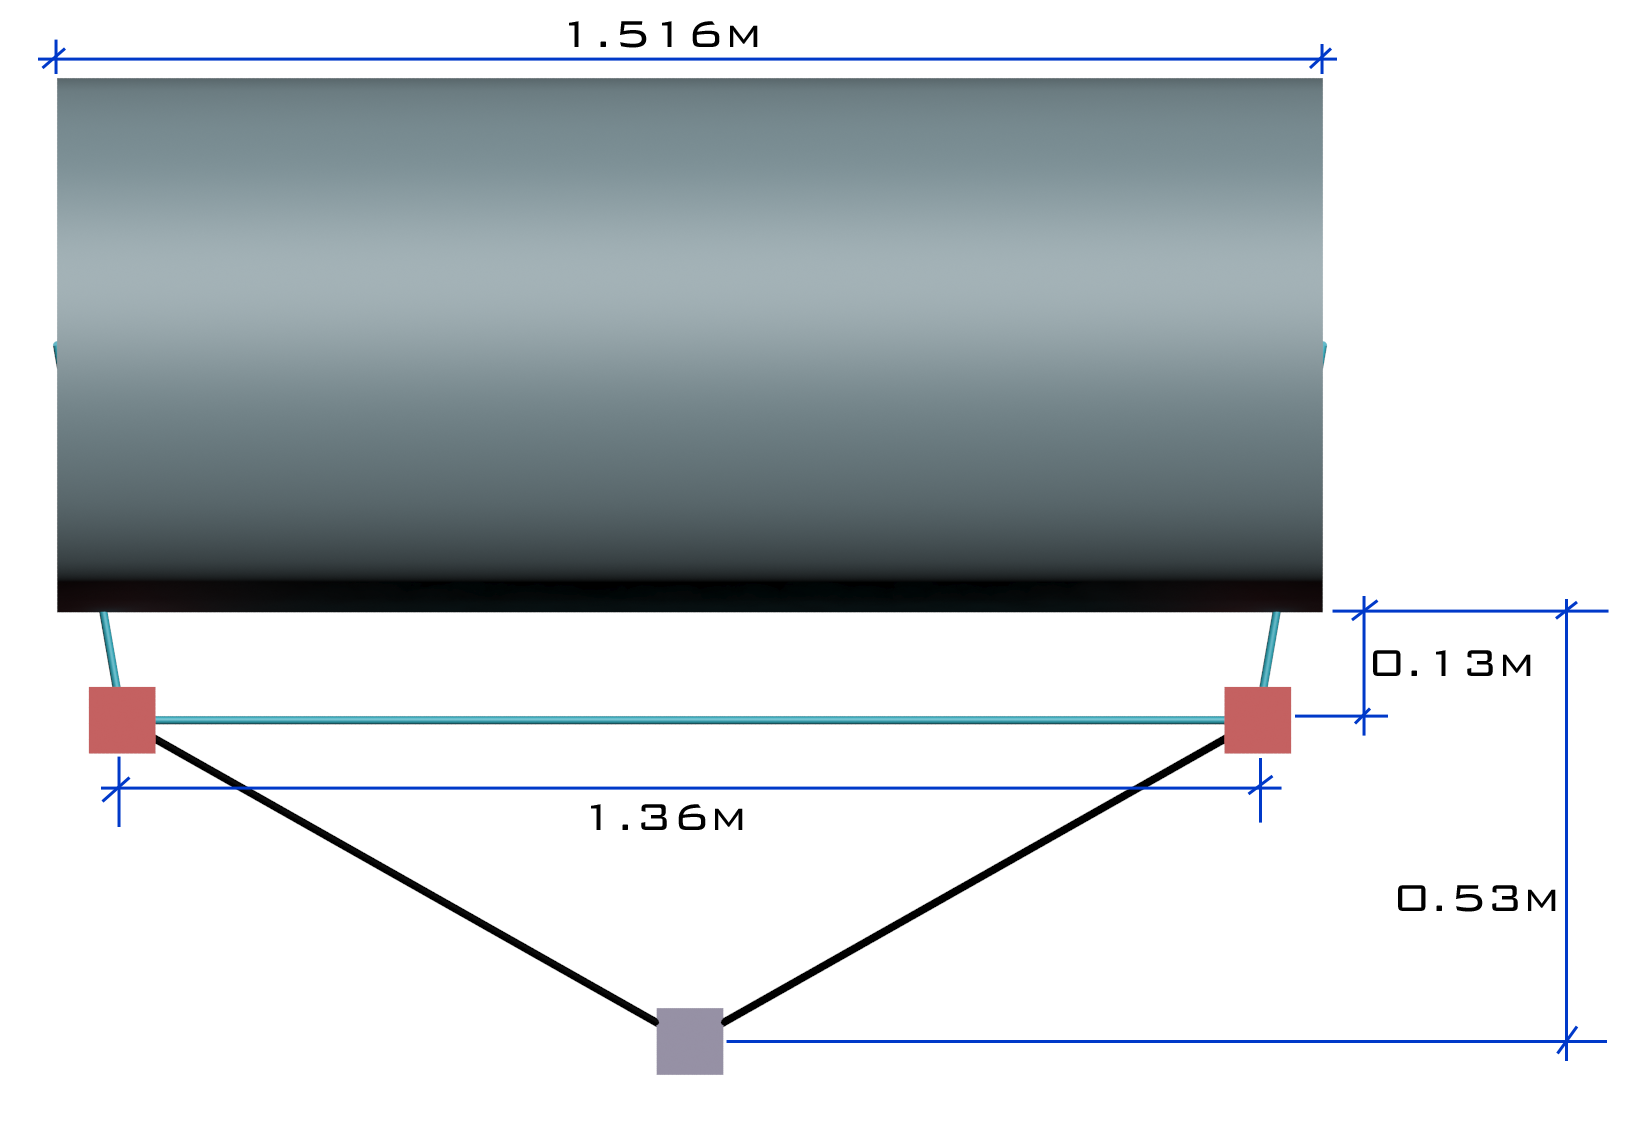
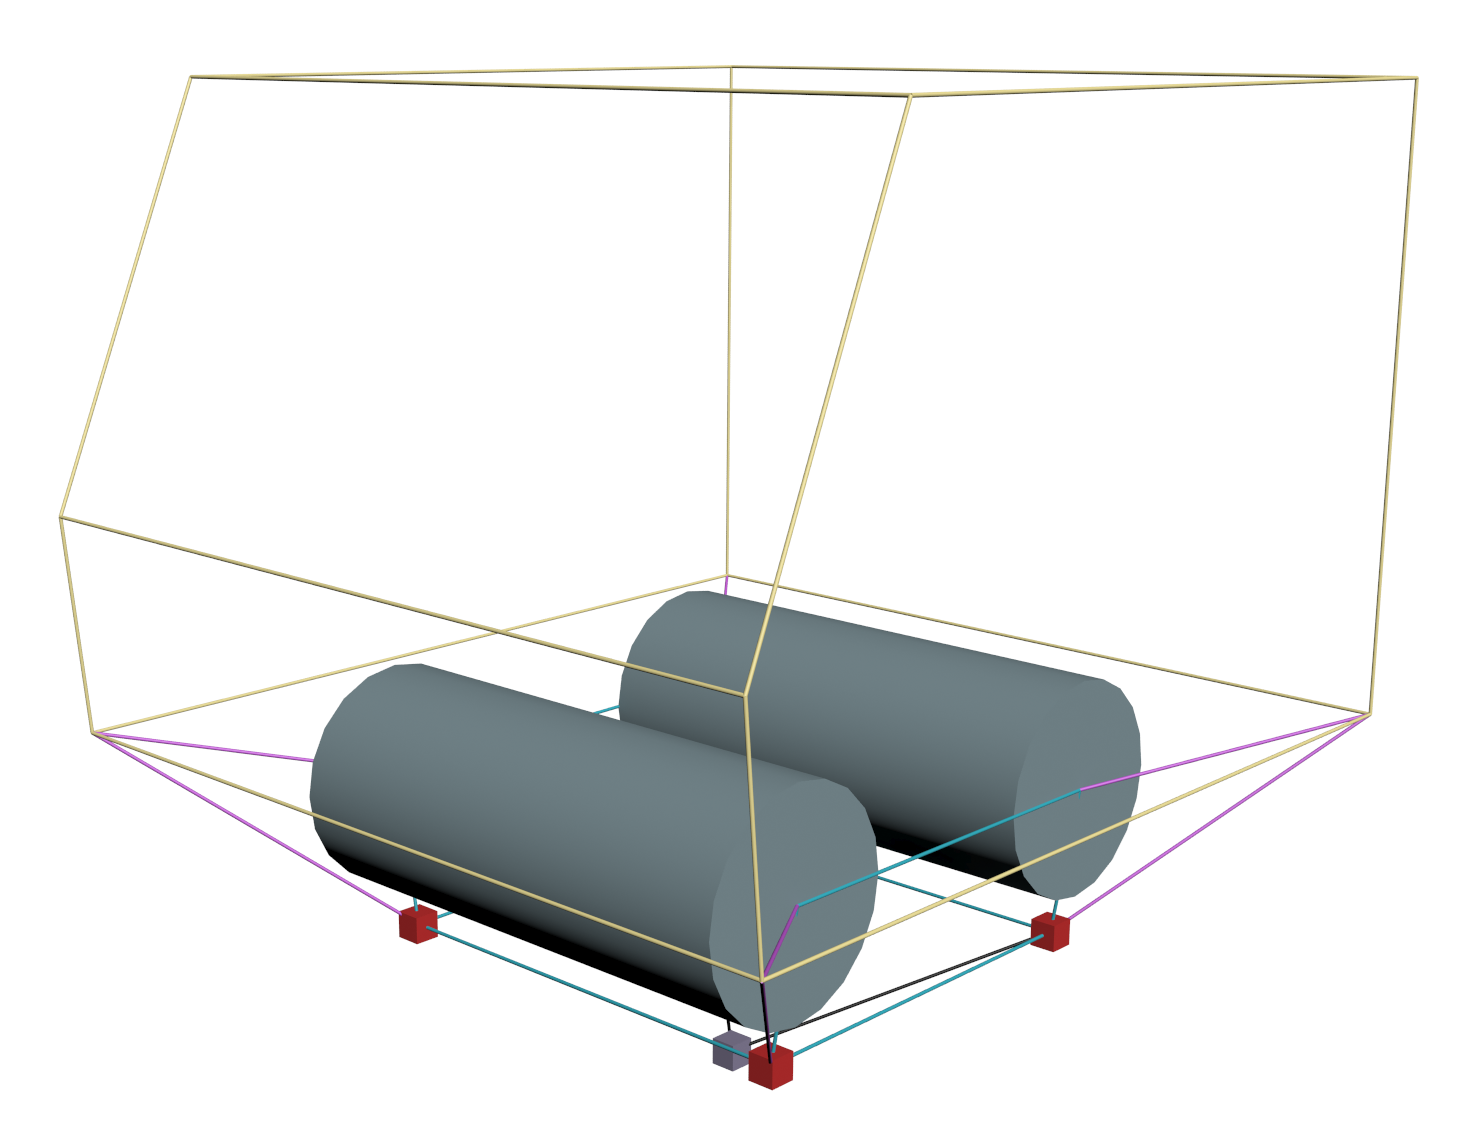
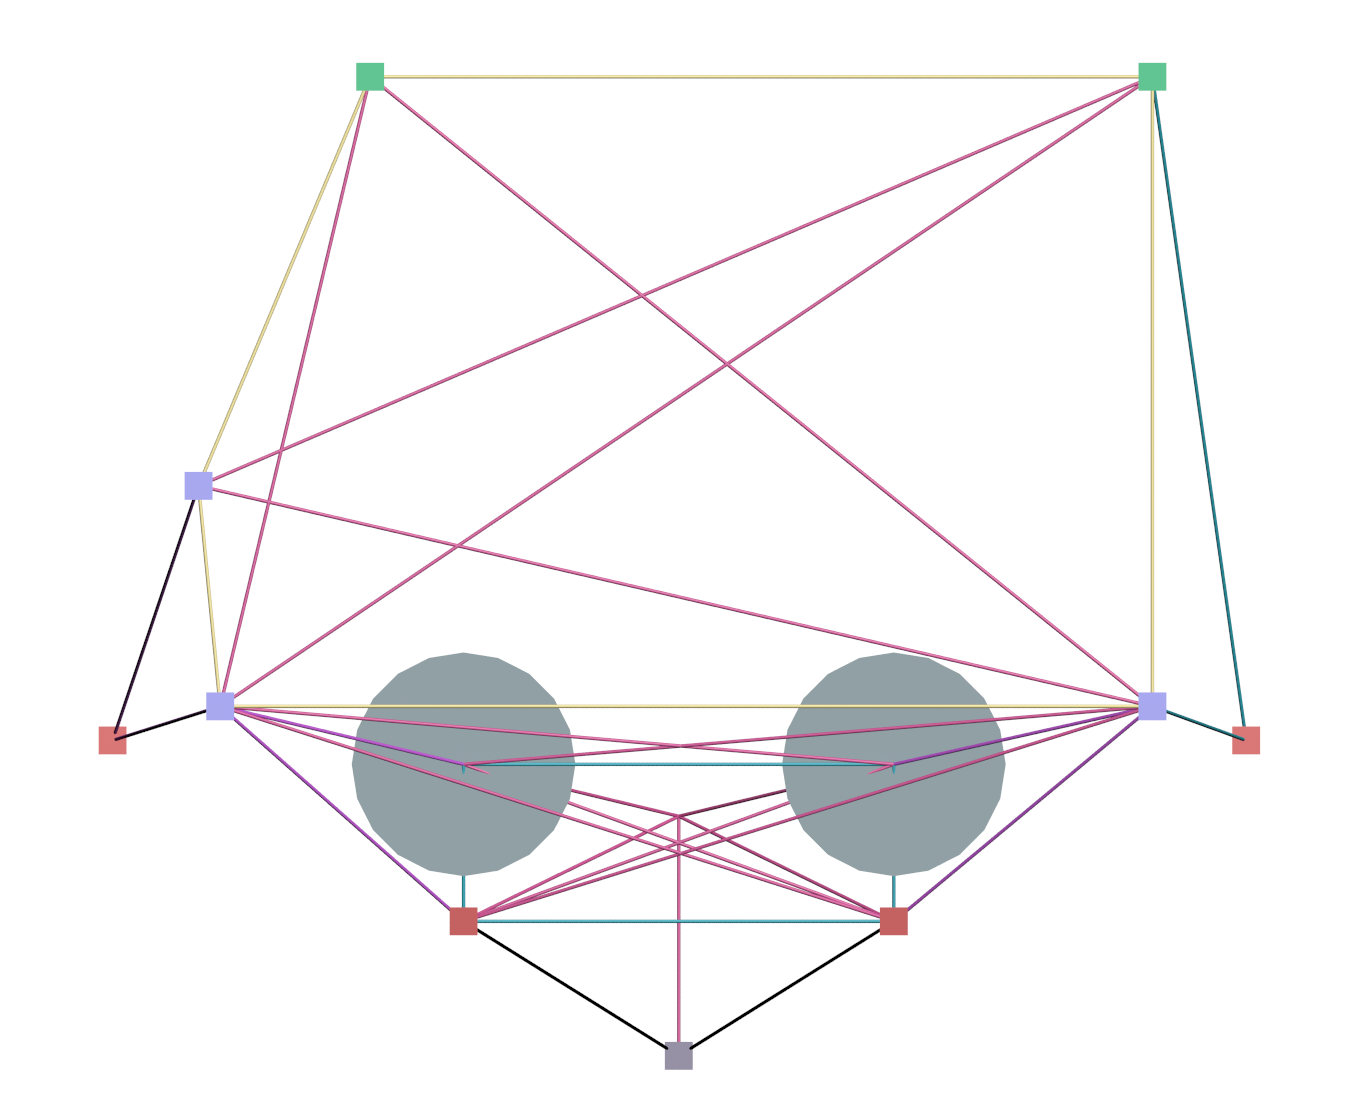
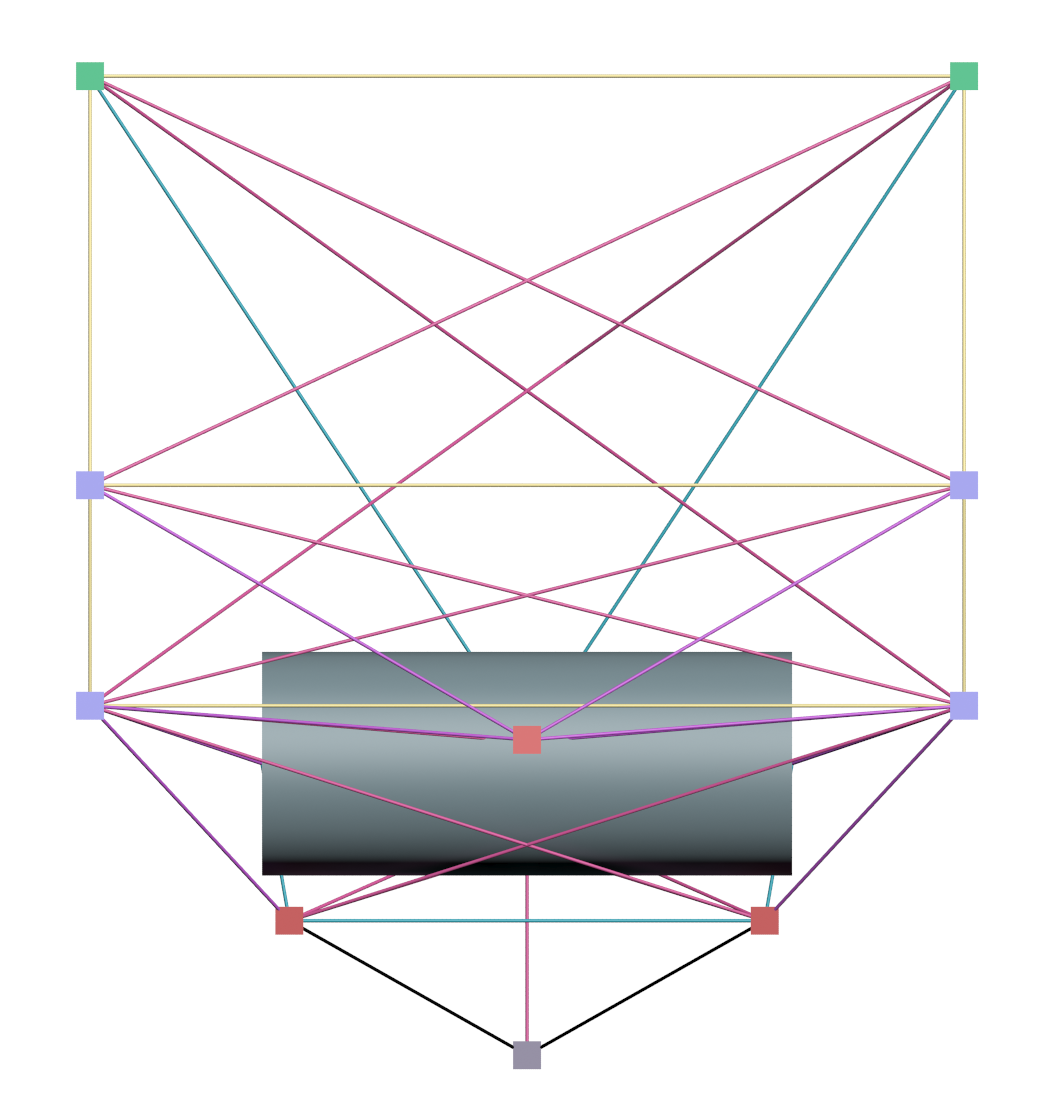
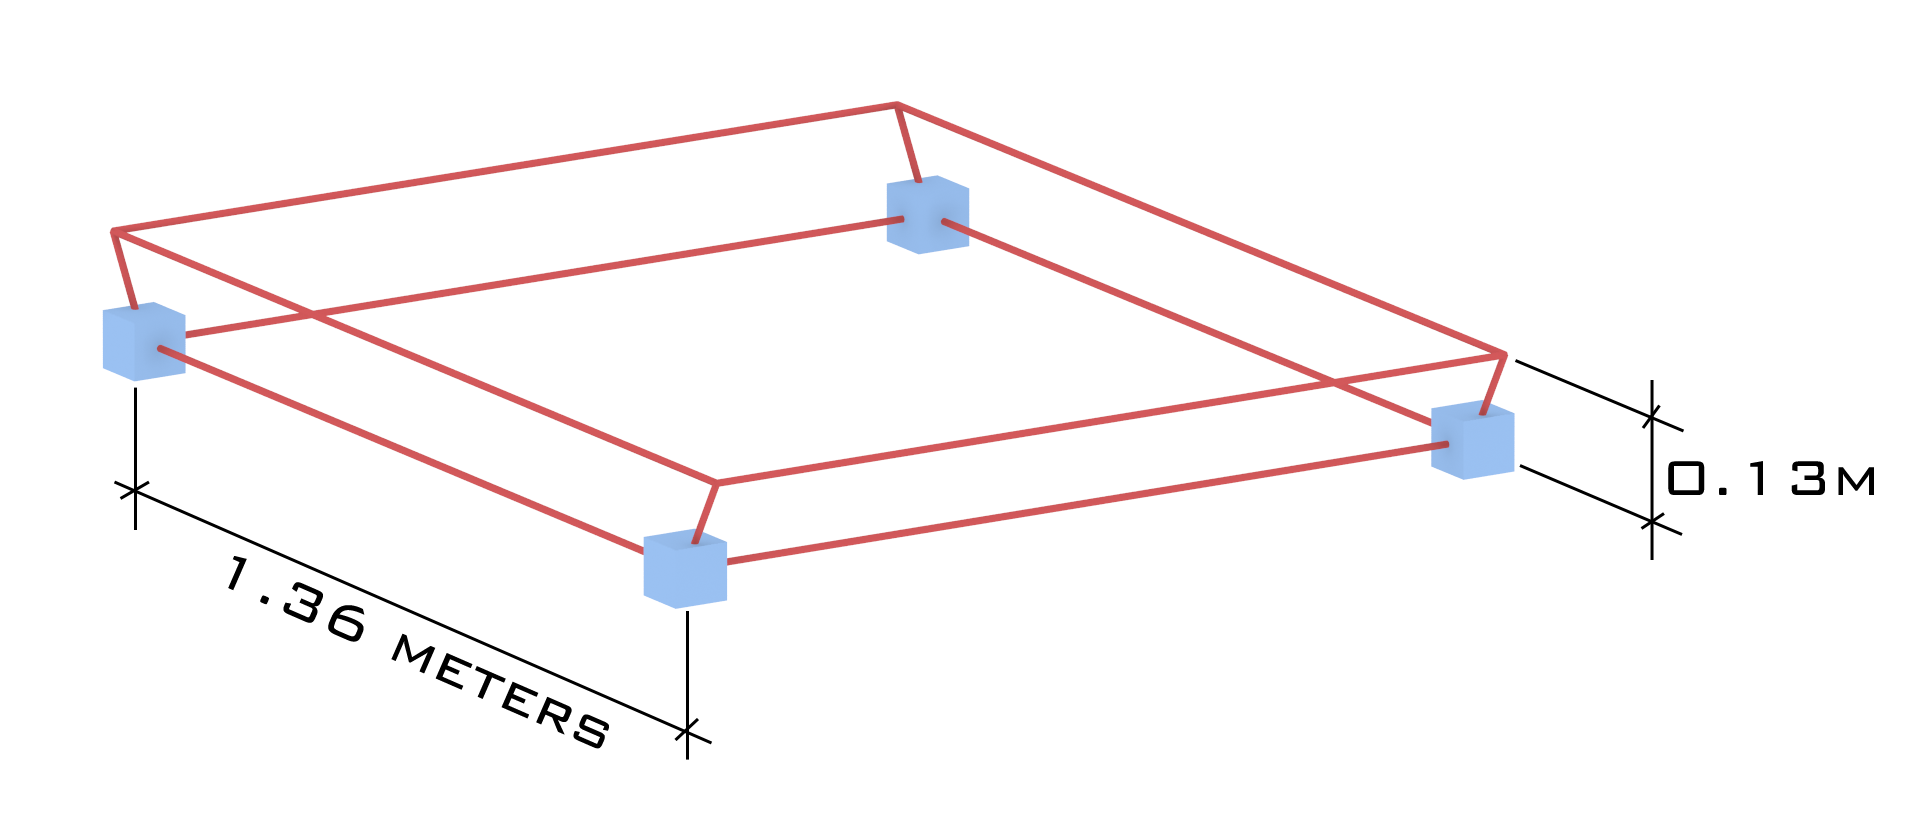
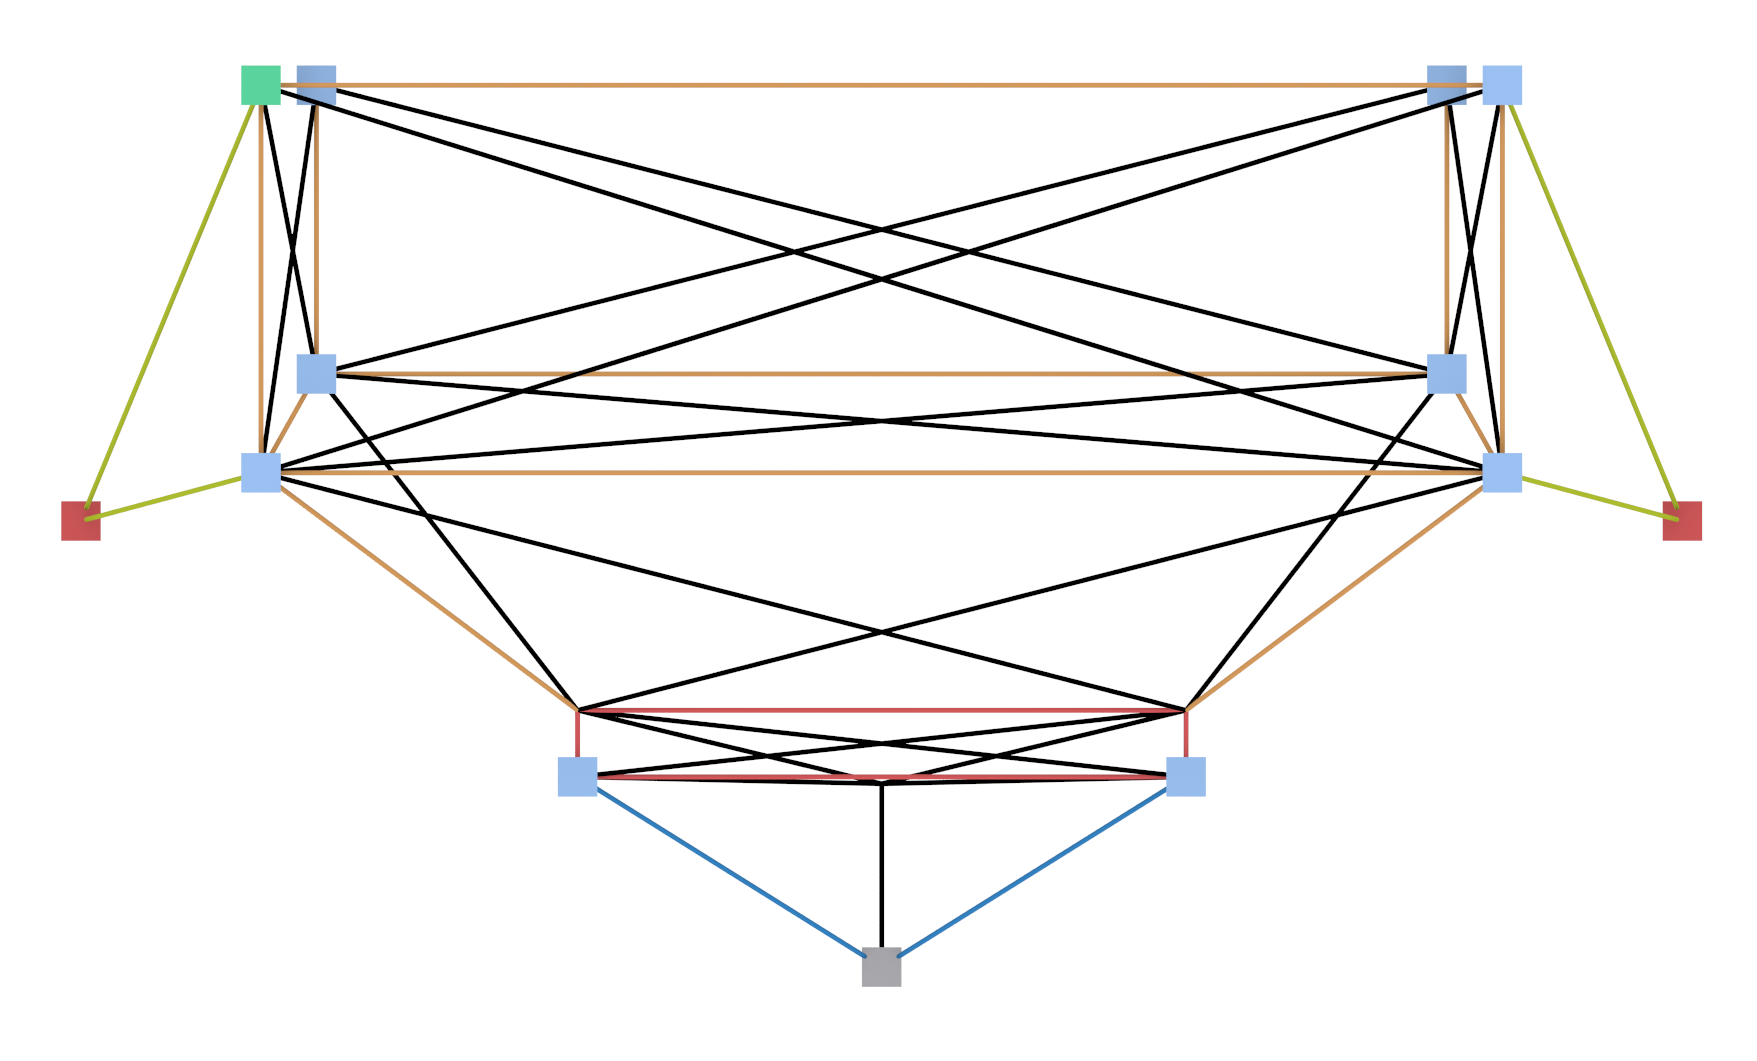
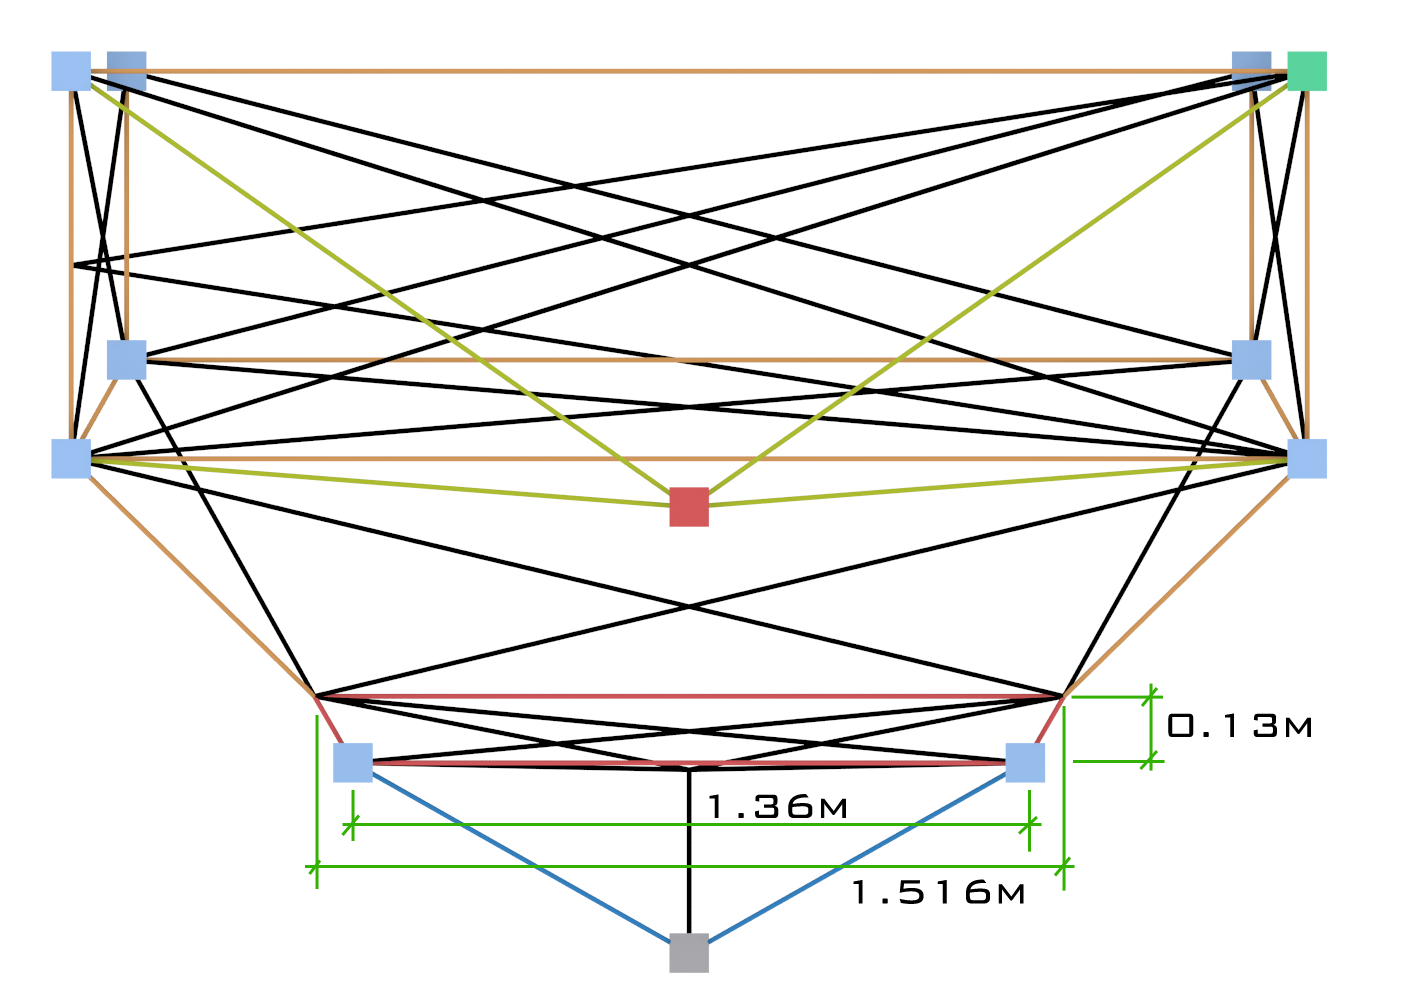
The bogie is the main part of our train. It holds the wheels and avoids the train from sliding off the rails. It has the shape of a trapezoid prism, the lower side is smaller than the upper. The 4 upper nodes are for the wheels, the four lower nodes are the guidance nodes. Those need to have low friction ( set_node_defaults -1, 0, -1, -1 ) and need to be contacters. Give them a mass of 50 kg using the l -option in the nodes section.
Step 2: Placement node
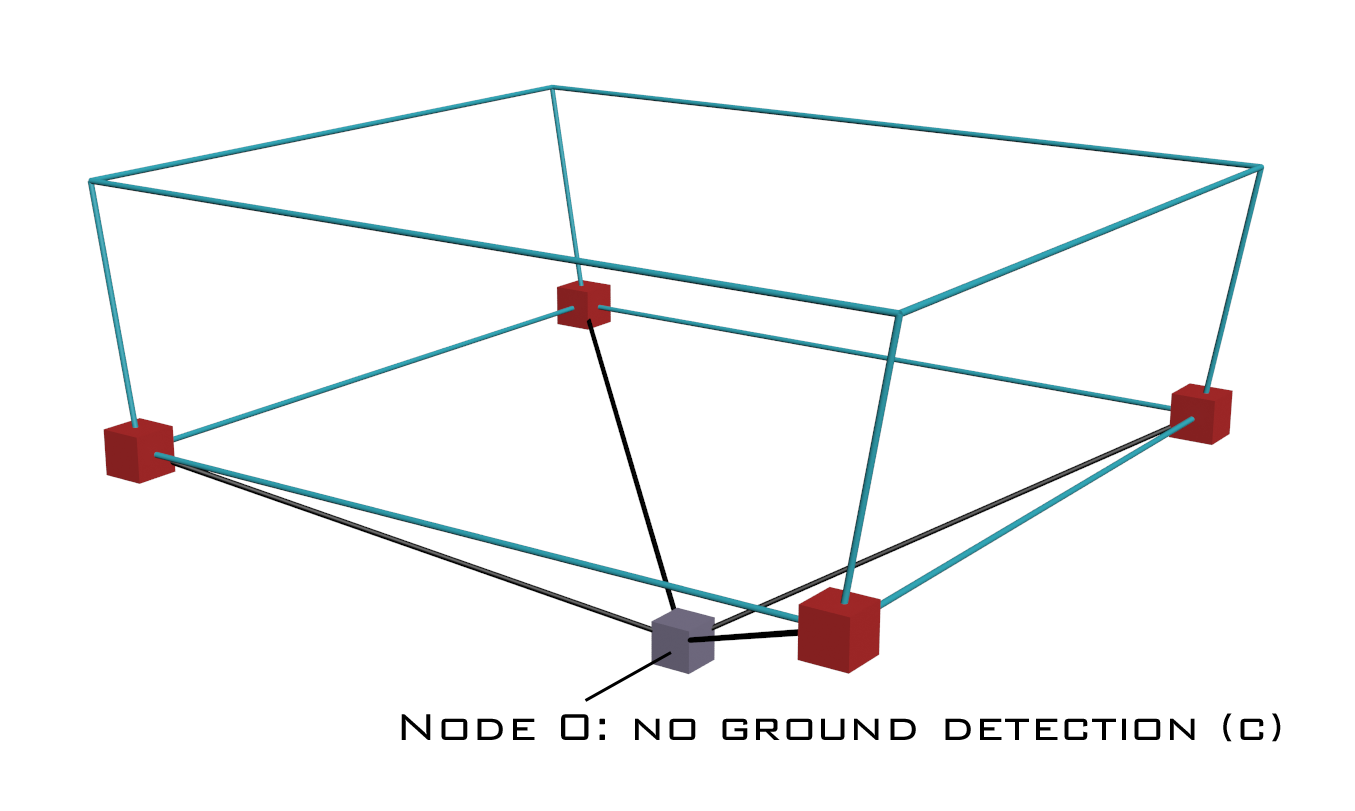
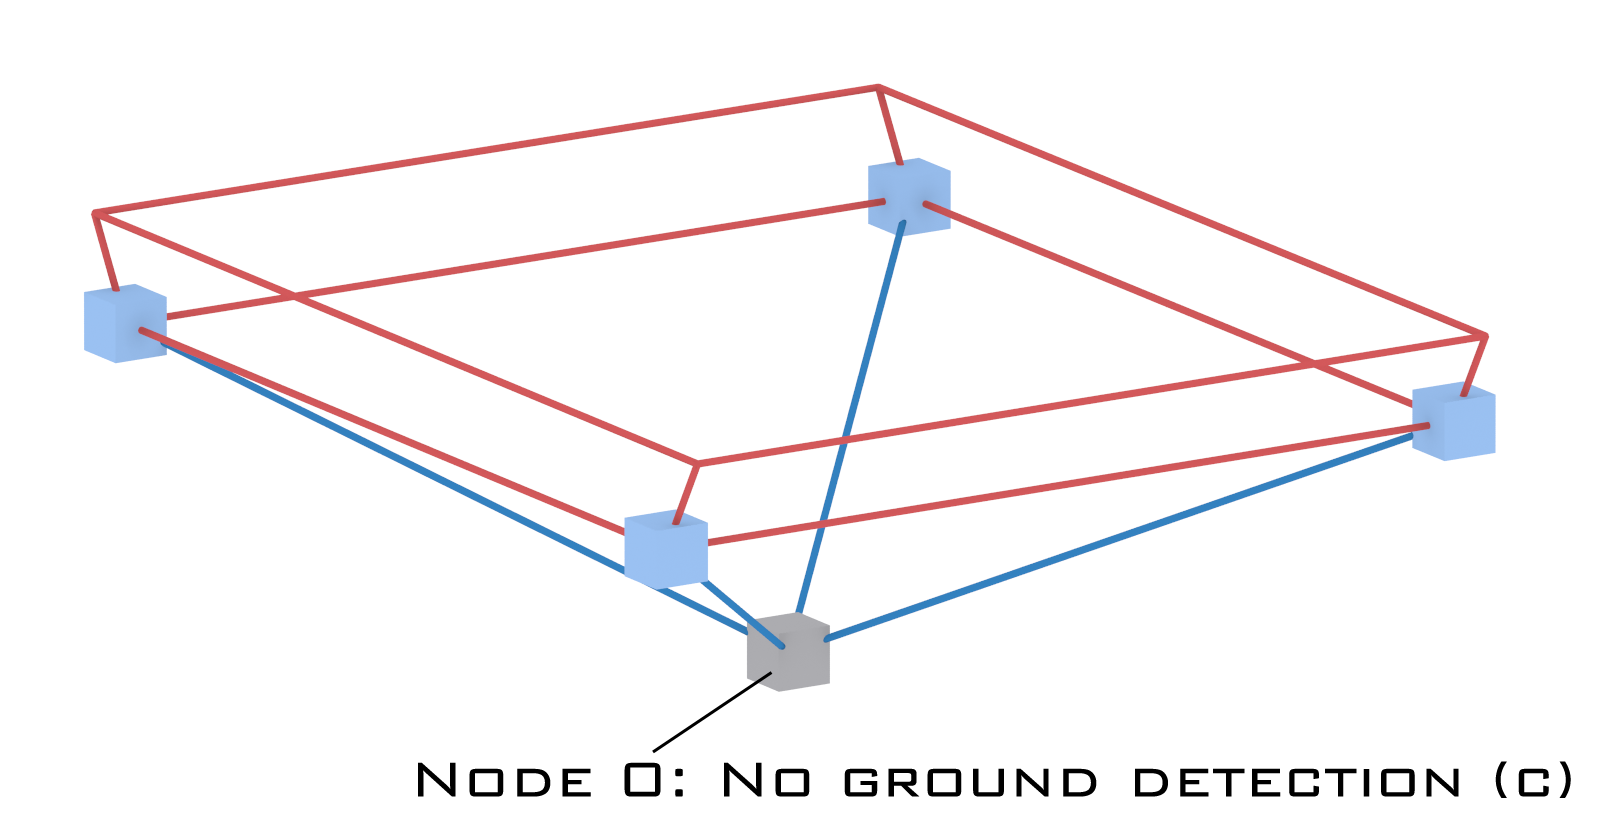
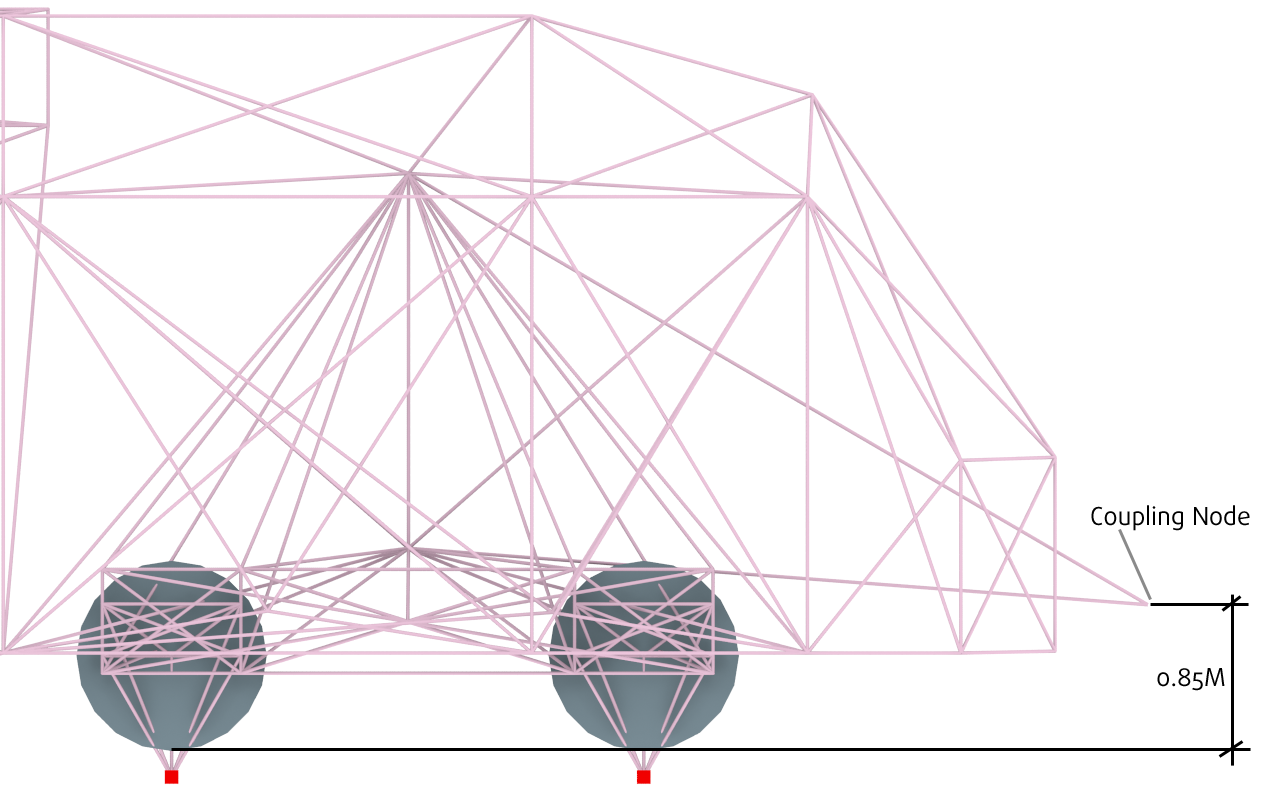
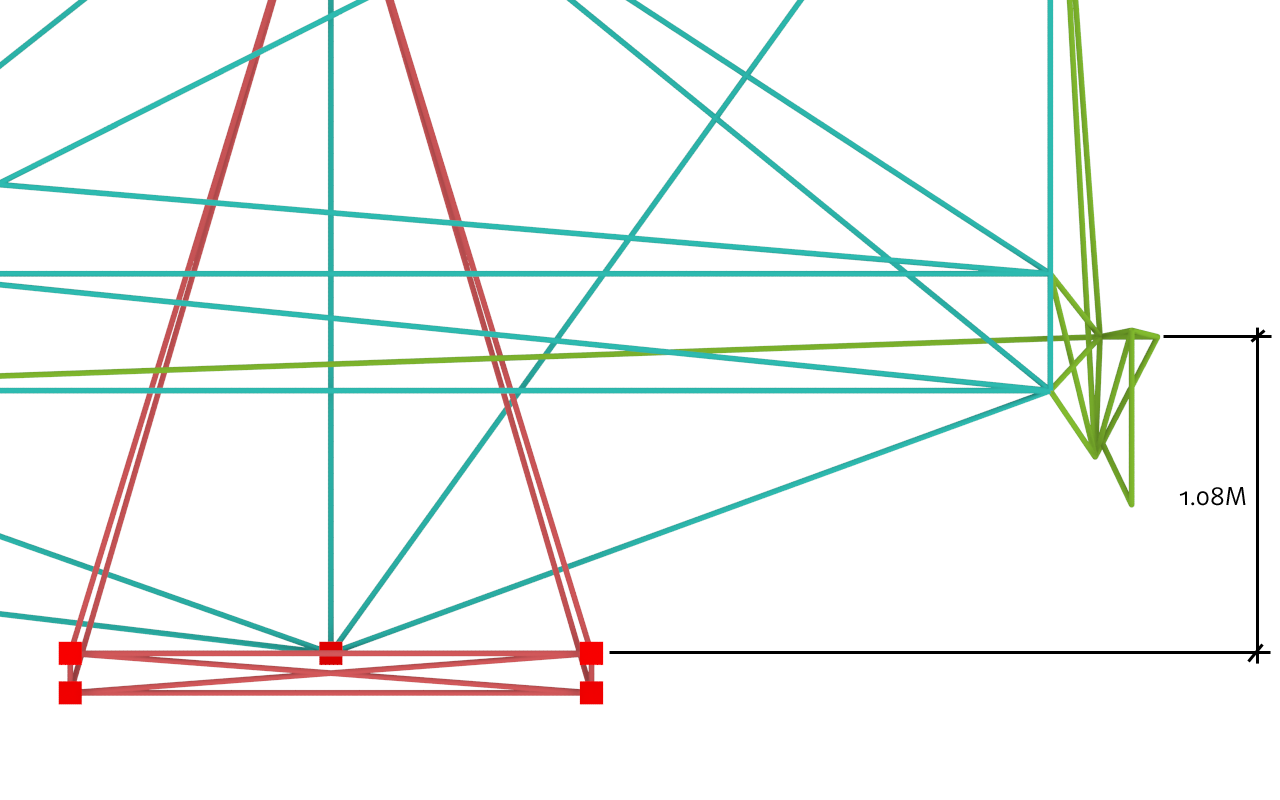
In order to spawn the train correctly in the train spawner, node 0 needs to be in the center of the train, 0.53 meters below the lowest edge of the wheel (See Fig. 4). For our tutorial train, we set node 0 in the middle of the bogie. Node 0 needs to have the c -option in the nodes section for no ground detection.
Step 3: Wheels
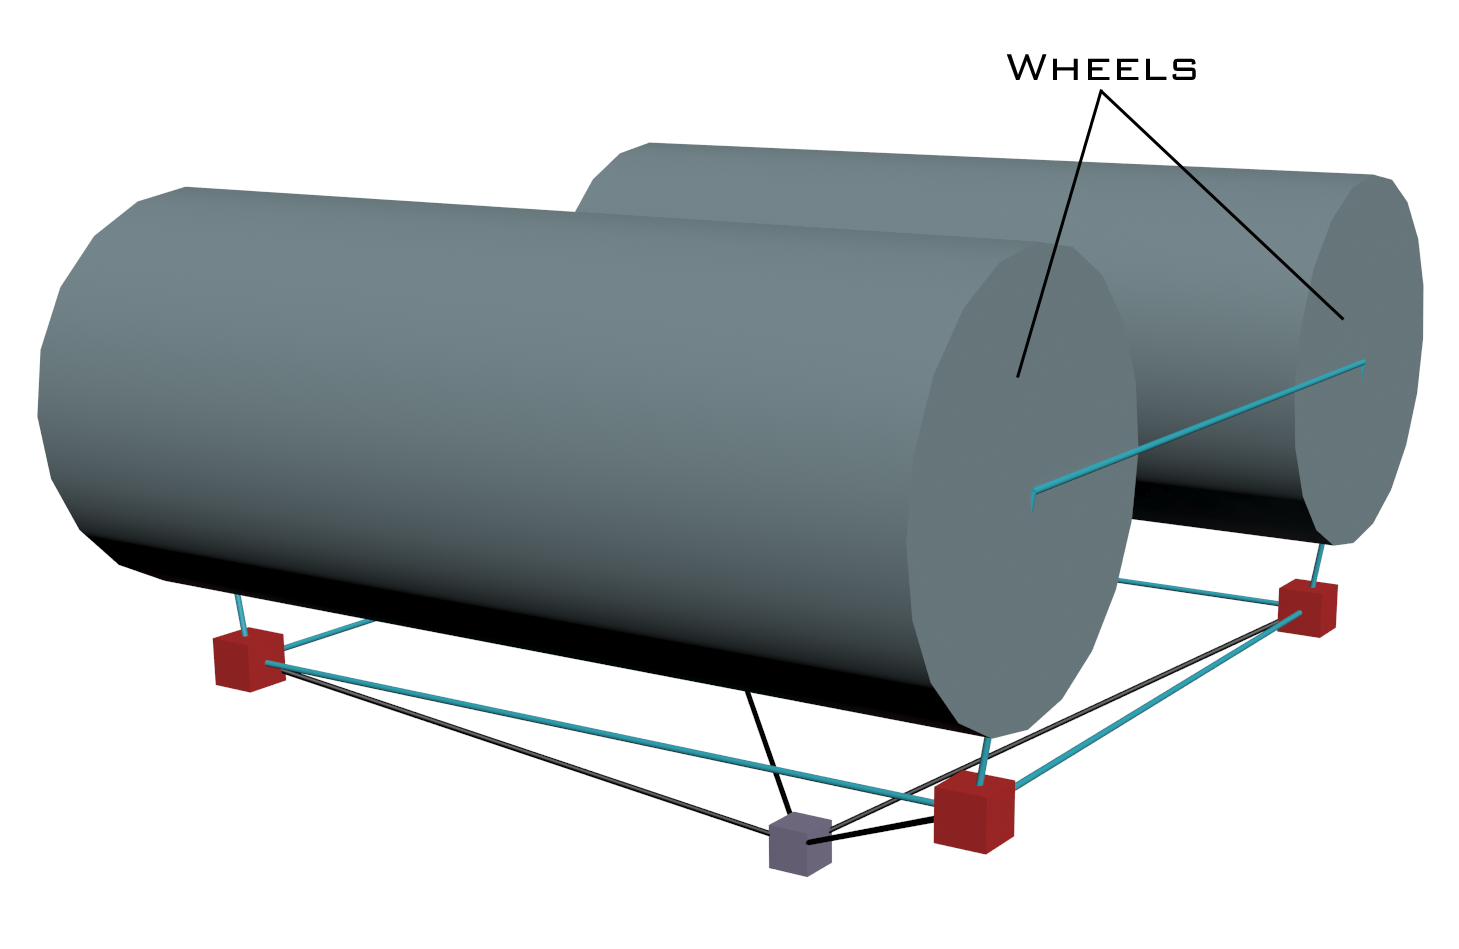
Now it's time to place the wheels between the upper nodes of the bogie. Remember to set the radius correctly. Fig. 4 ("front view") shows the important sizes of what we have so far
Step 4: Chassis
It's time to build a chassis and, on this train, connect it directly to the bogie.
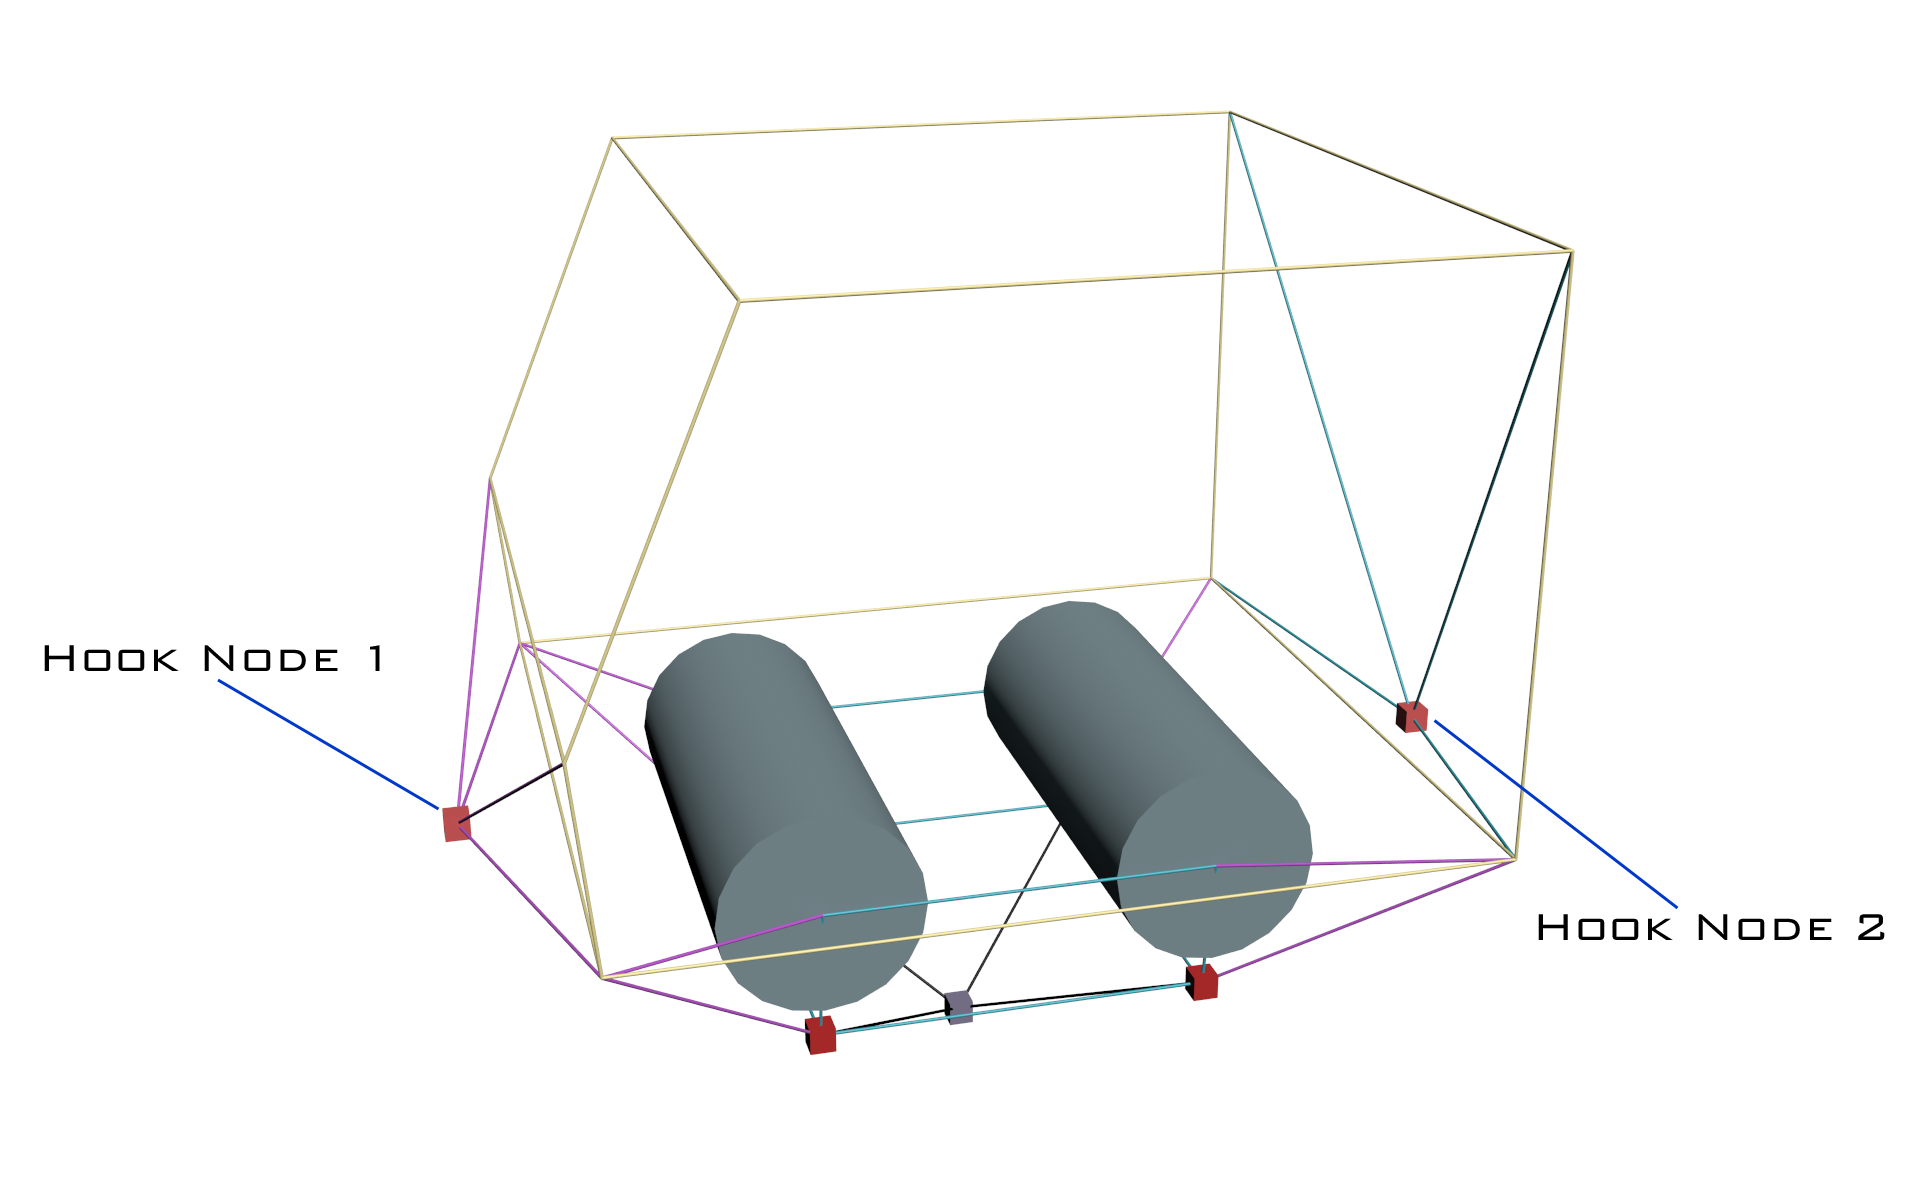
Step 5: Couplers
Now we add simple couplers to the front and back of the train. We are using hooknodes with the auto-lock option.
Step 6: Support beams
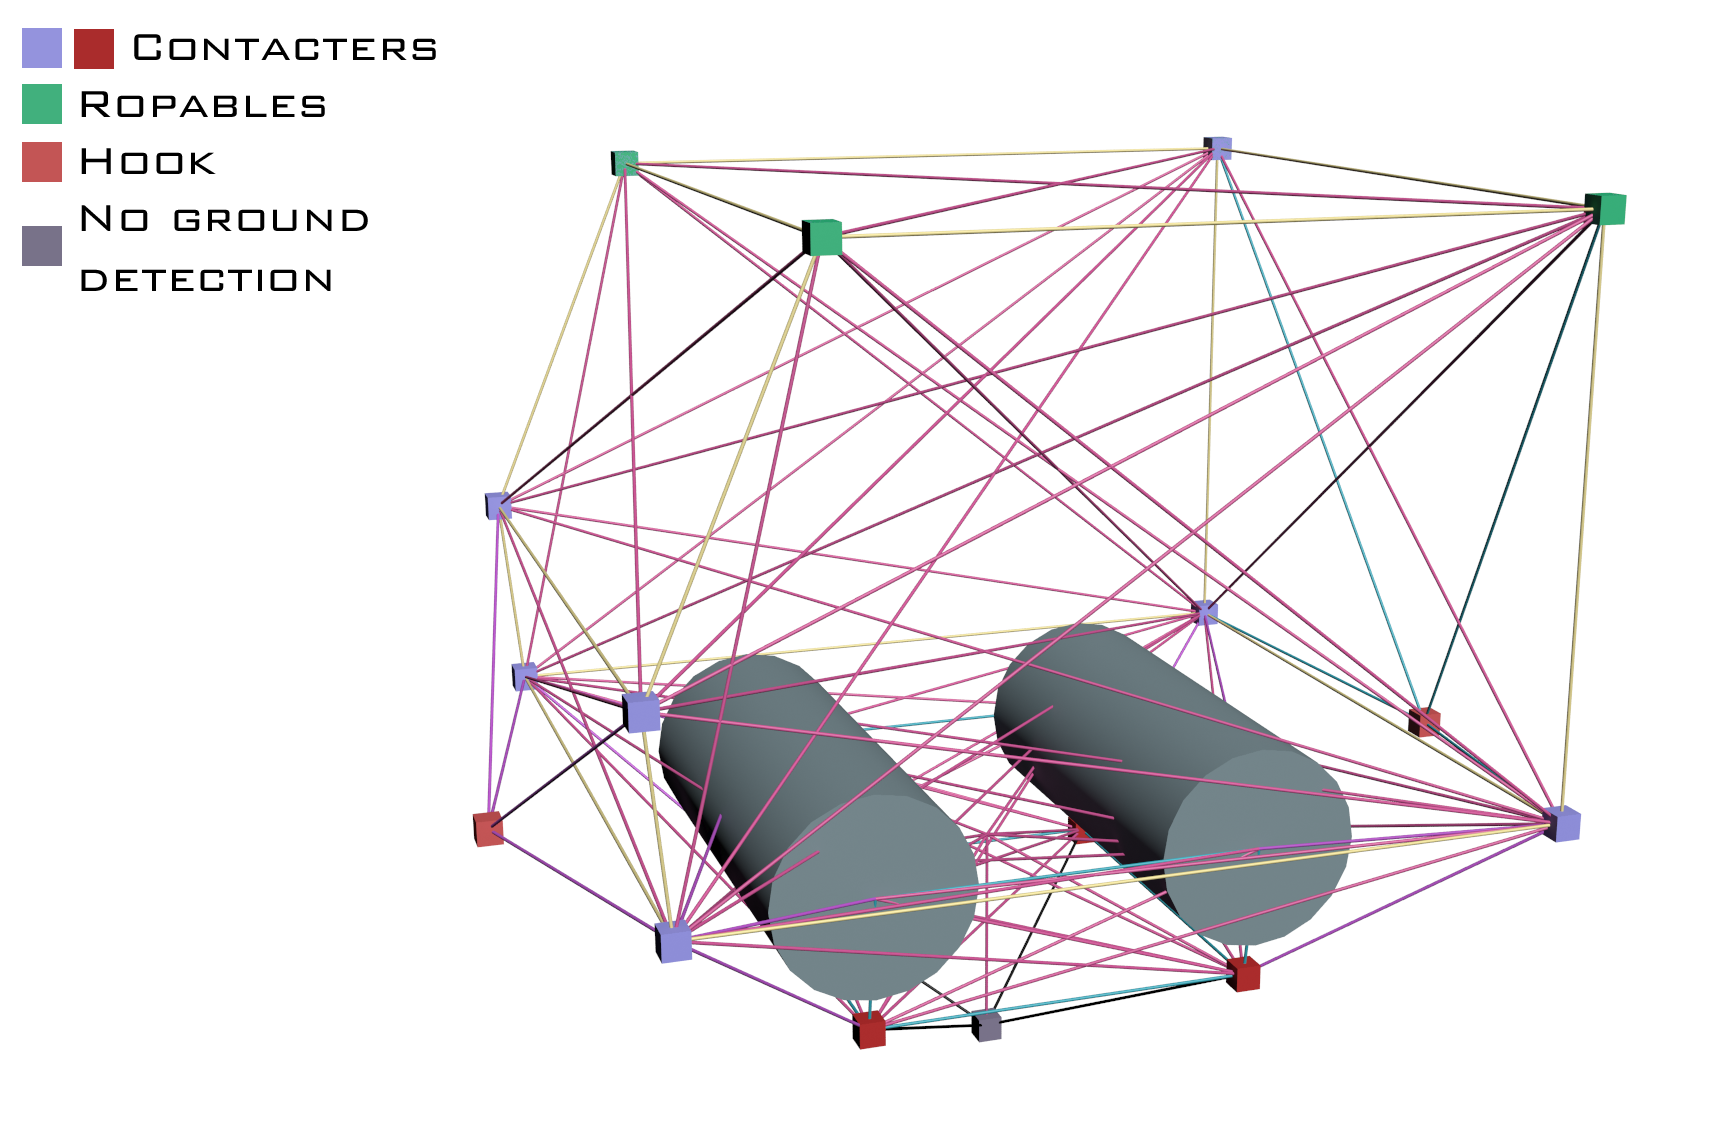
The last step is to add more beams to make the structure stable. We can also add contacters and ropables.
Step 7: Tweaking the truckfile
Now the node and beam of our train is finished, now it's time to tweak the truckfile.
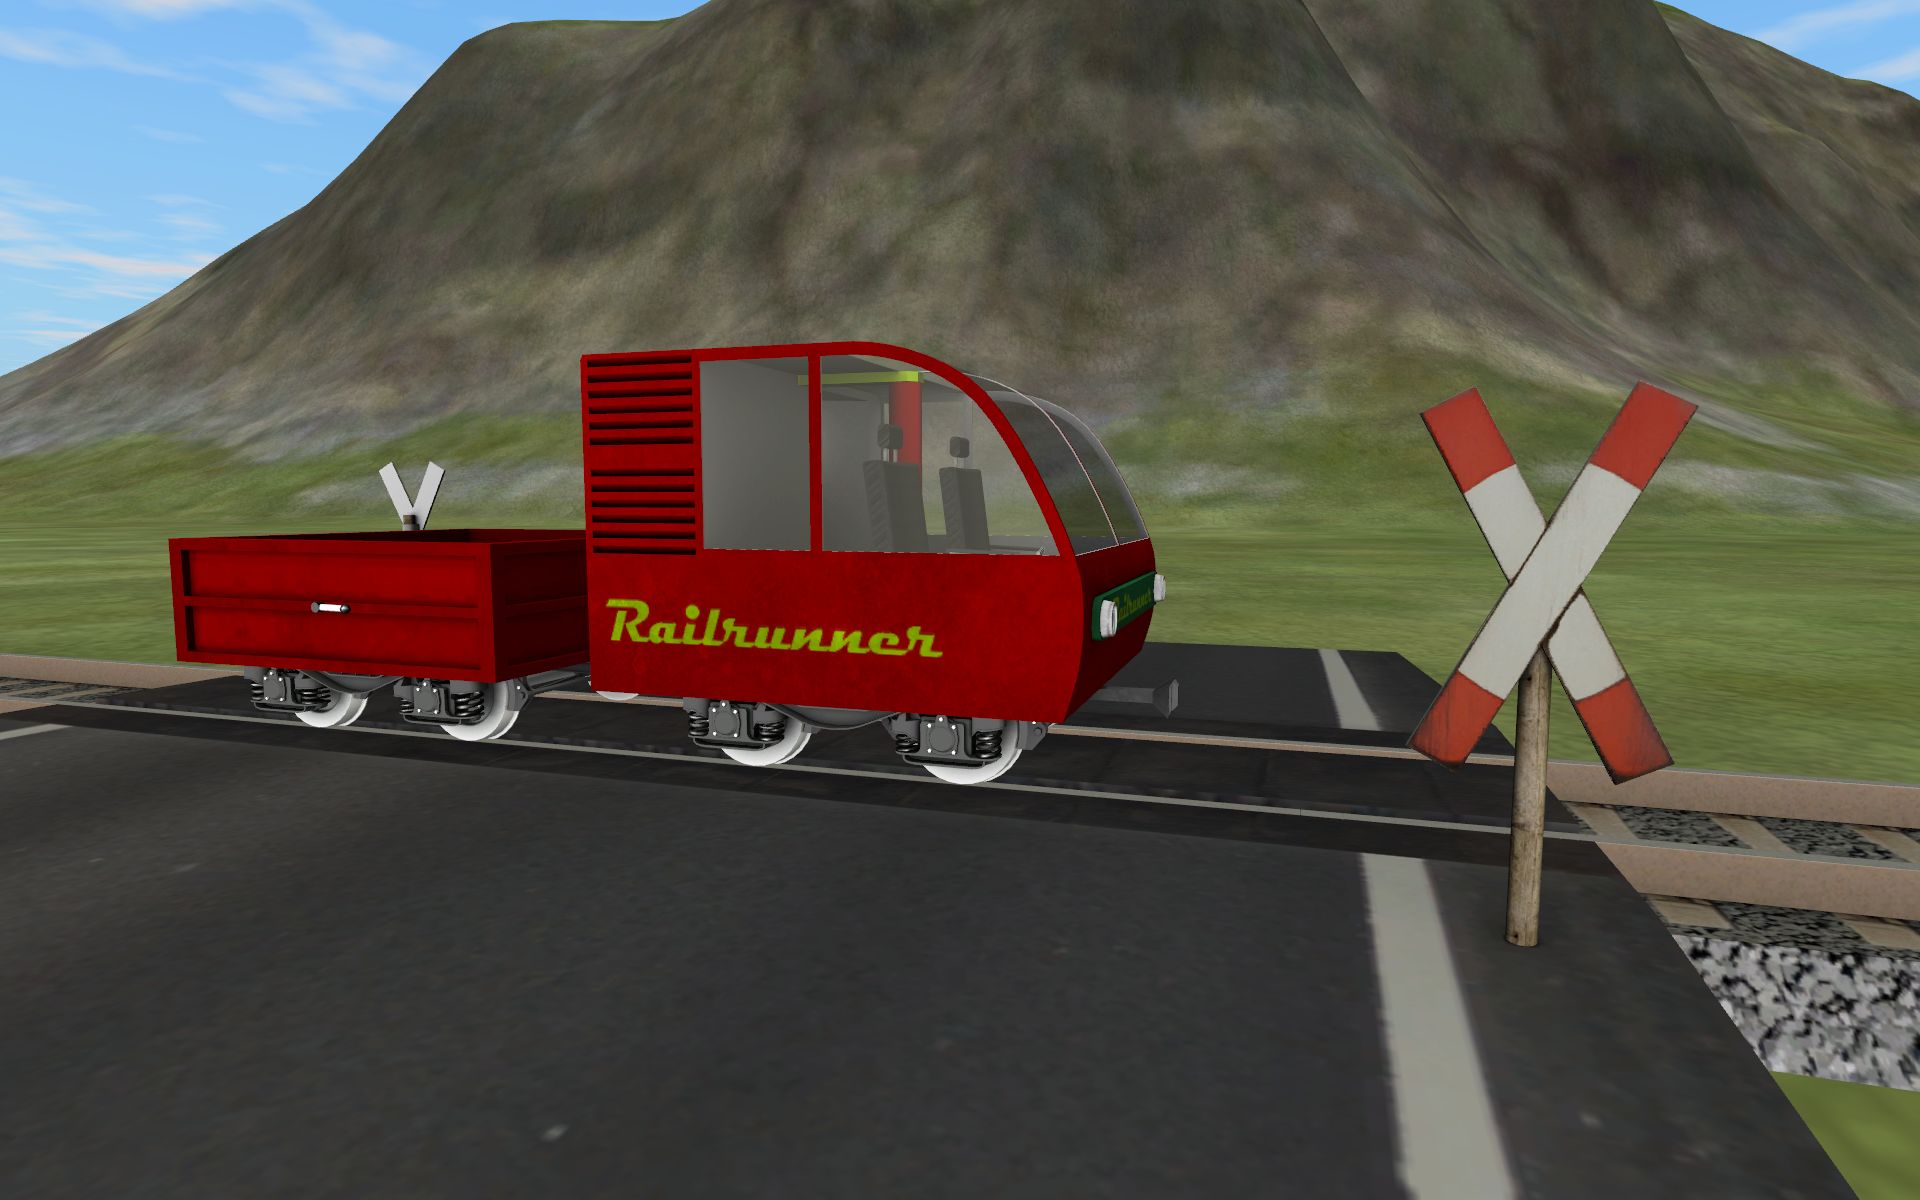
Download the finished train and look into the truckfile: Railrunner
Please note the comments in there!
Building a wagon
Step 1: Bogie
The bogie is the main part of our wagon. It holds the wagon on the rails. It has the shape of a trapezoid prism, the lower side is smaller than the upper. The 4 upper nodes slide on top of the rail, the four lower nodes are the guidance nodes. Make them all low friction ( set_node_defaults -1, 0, -1, -1 ). The four lower nodes need to be contacters. Give them a mass of 50 kg using the "l"-option in the nodes section.
Step 2: Placement node
In order to spawn the wagon correctly in the train spawner, node 0 needs to be in the center of the train, 0.53 meters below the upper four nodes of our bogie. Node 0 needs to have the "c"-option in the nodes section for no ground detection.
Step 4: Chassis
We add the chassis.
Step 5: Couplers
Now we add simple couplers to the front and back of the wagon. We are using hooknodes with the auto-lock option (Attention: disable high quality reflective effects in RoR, otherwise it will crash).
Step 6: Support beams
The last step is to add more beams to make the structure stable. We can also add contacters and ropables.
Step 7: Tweaking the truckfile
Now the node and beam of our wagon is finished, it's time to tweak the truckfile.
Download the finished train and look into the truckfile: Railrunner
Please note the comments in there!
Coupling Systems
Automatic couplers
If you want to make your train compatible to BigBoy's American trains (Janney (AAR) coupler), this is the coupling system for you. It is a very easy automatic system. Use the following code for the coupling nodes. The node ID's need to be adjusted to your train.
hooks
;nd_id, options
162, lockgroup: 54, hookgroup: -55, auto-lock
163, lockgroup: 54, hookgroup: -55, auto-lock

lockgroups
;lockgroup, nd_id
54, 162, 163

triggers
;id3, id4, short, long, shortkey, longkey, options
44, 165, 0.05, 0.1, -55, -56, ih
Buffers and chain coupling
This is the standard European buffer and chain coupling. It is much more complex than the automatic coupling above. As this is quite complicated and hard to rebuild, please use the node and beam of the Rbns 641 freight wagon as a template.
Chain coupling
First image shows standard position of the couplers. When a trigger is activated, it disengages a hook on the left and lets the chain piece swing down. Another hook is engaged, connecting the chain to the other coupling.
![fig20-eu-coupling-inactive] (/images/rail-vehicles-tutorial-eu-coupling-inactive.png) ![fig21-eu-locking-position] (/images/rail-vehicles-tutorial-eu-locking-position.png) ![fig22-eu-connected] (/images/rail-vehicles-tutorial-eu-connected.png)
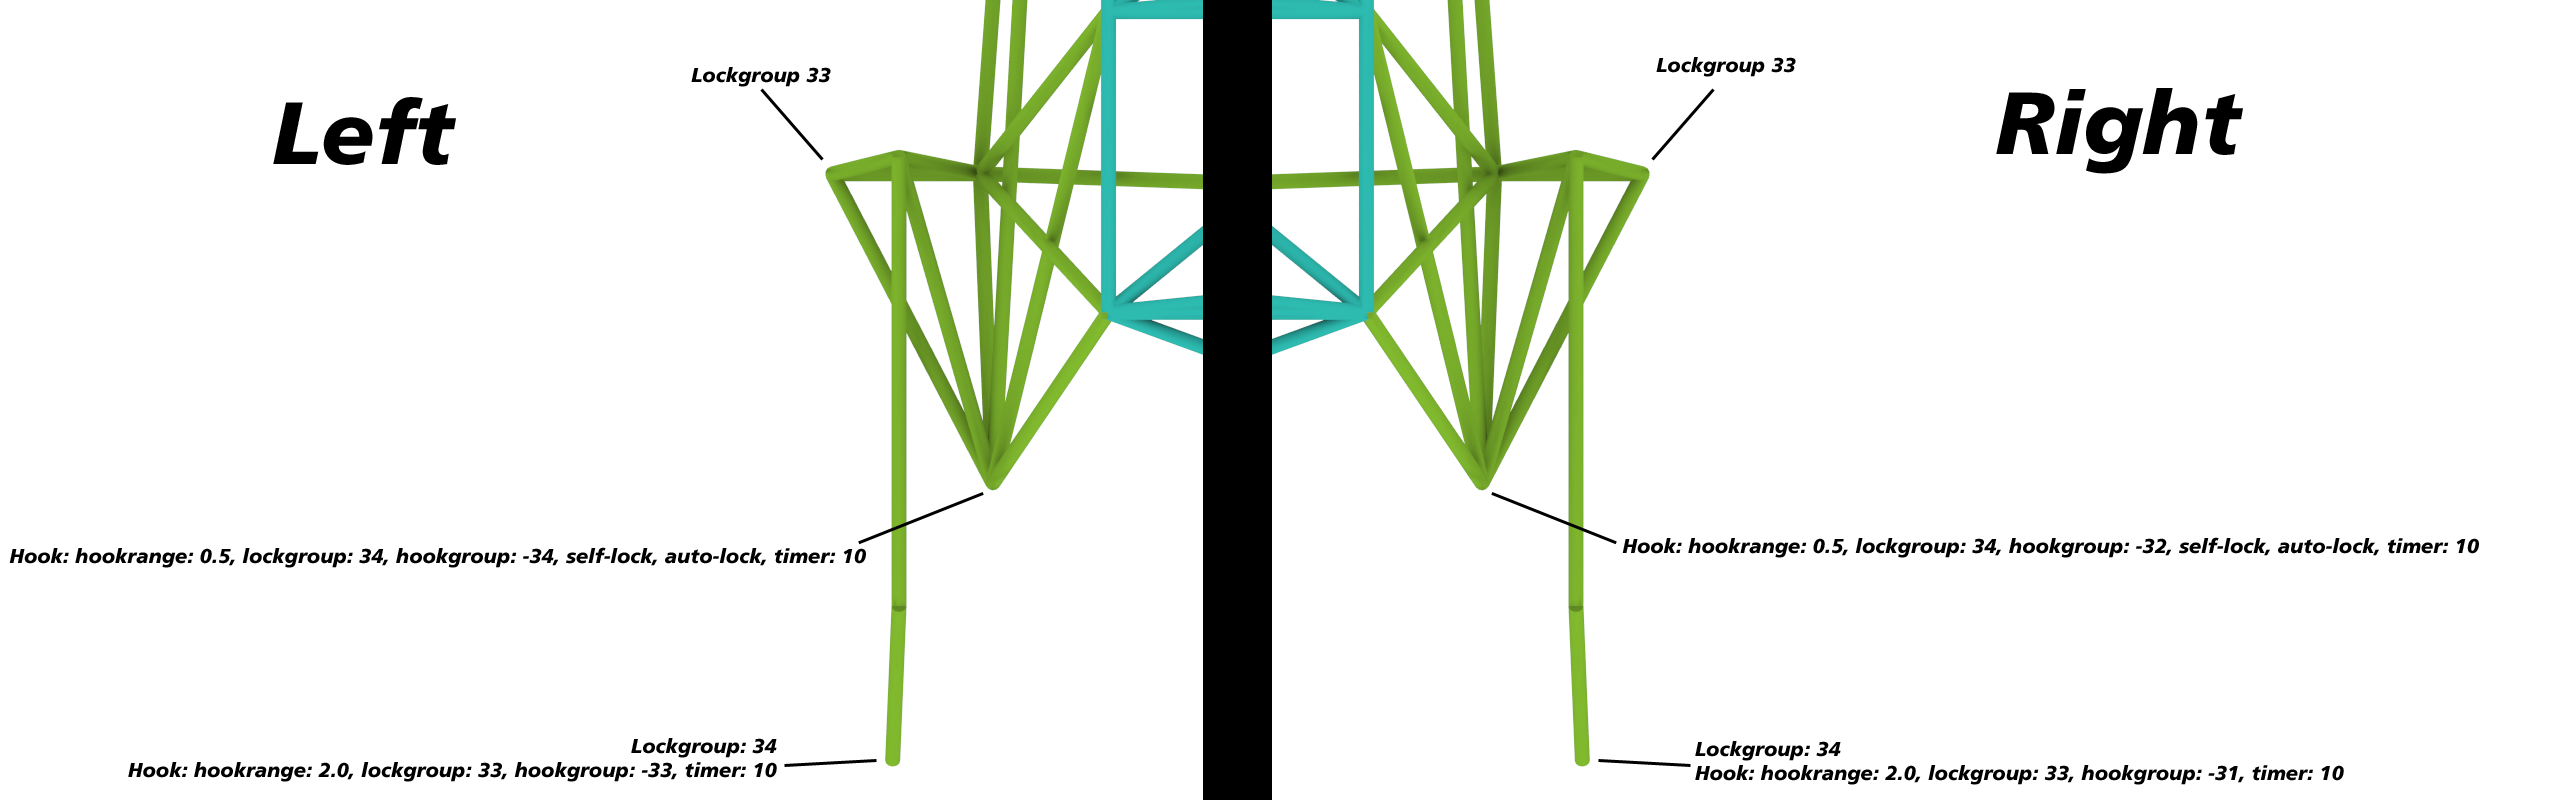
Trigger code:
triggers
;left
  nd1,   nd2, 0.900, 10.00, -32, -32, ich  ;unlock hookgroup -32 (chain falls down)
  nd1,   nd2, 0.910, 10.00, -31, -31, icH  ;lock hookgroup -31 (coupling connects to 2nd wagon)
  nd1,   nd2, 0.001, 1.100, -31, -31, ich  ;unlock hookgroup -31 (coupling deconnects from 2nd wagon)
  nd1,   nd2, 0.001, 1.100, -32, -32, icH  ;lock hookgroup -32 (chain goes to rest position)

;right
  nd1,   nd2, 0.900, 10.00, -34, -34, ich  ;unlock hookgroup -34 (chain falls down)
  nd1,   nd2, 0.910, 10.00, -33, -33, icH  ;lock hookgroup -33 (coupling connects to 2nd wagon)
  nd1,   nd2, 0.001, 1.100, -33, -33, ich  ;unlock hookgroup -33 (coupling deconnects from 2nd wagon)
  nd1,   nd2, 0.001, 1.100, -34, -34, icH  ;lock hookgroup -34 (chain goes to rest position)
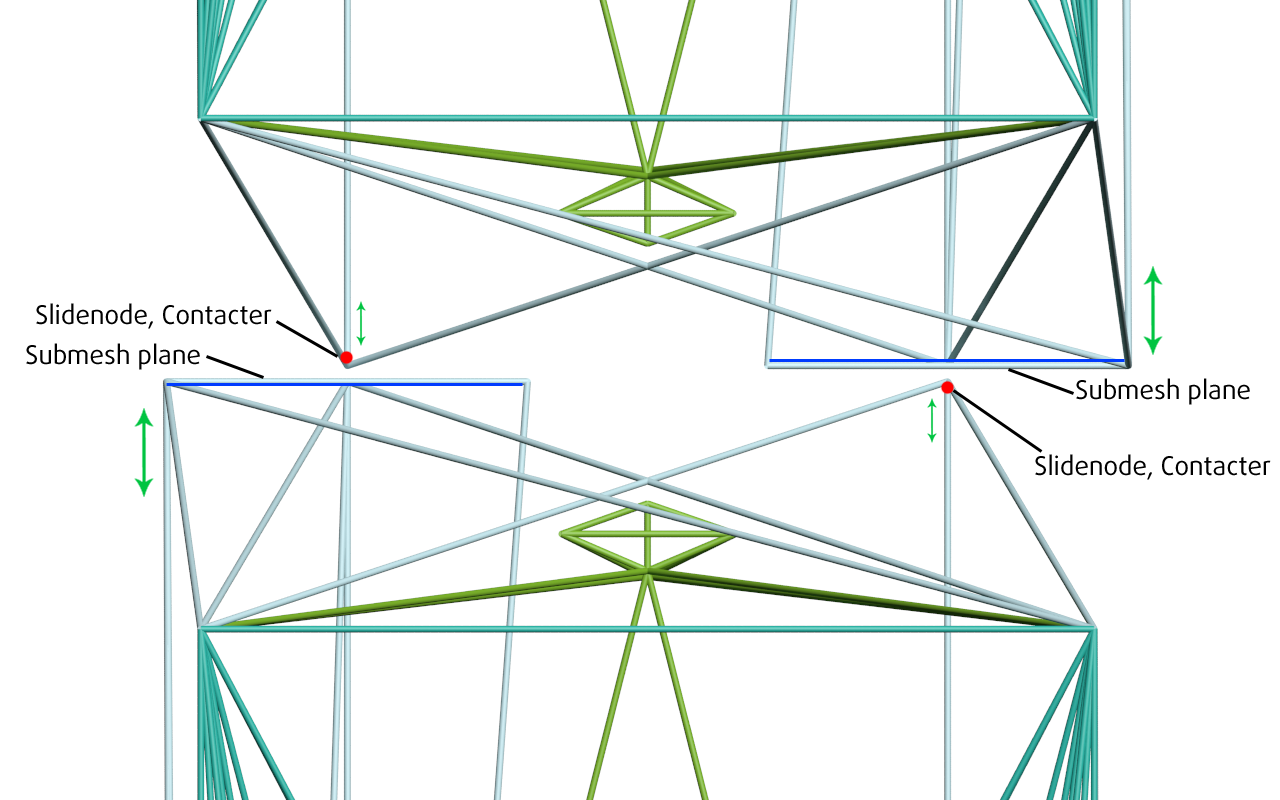
Buffers
The European coupling system needs buffers to absorb collisions between the wagons.
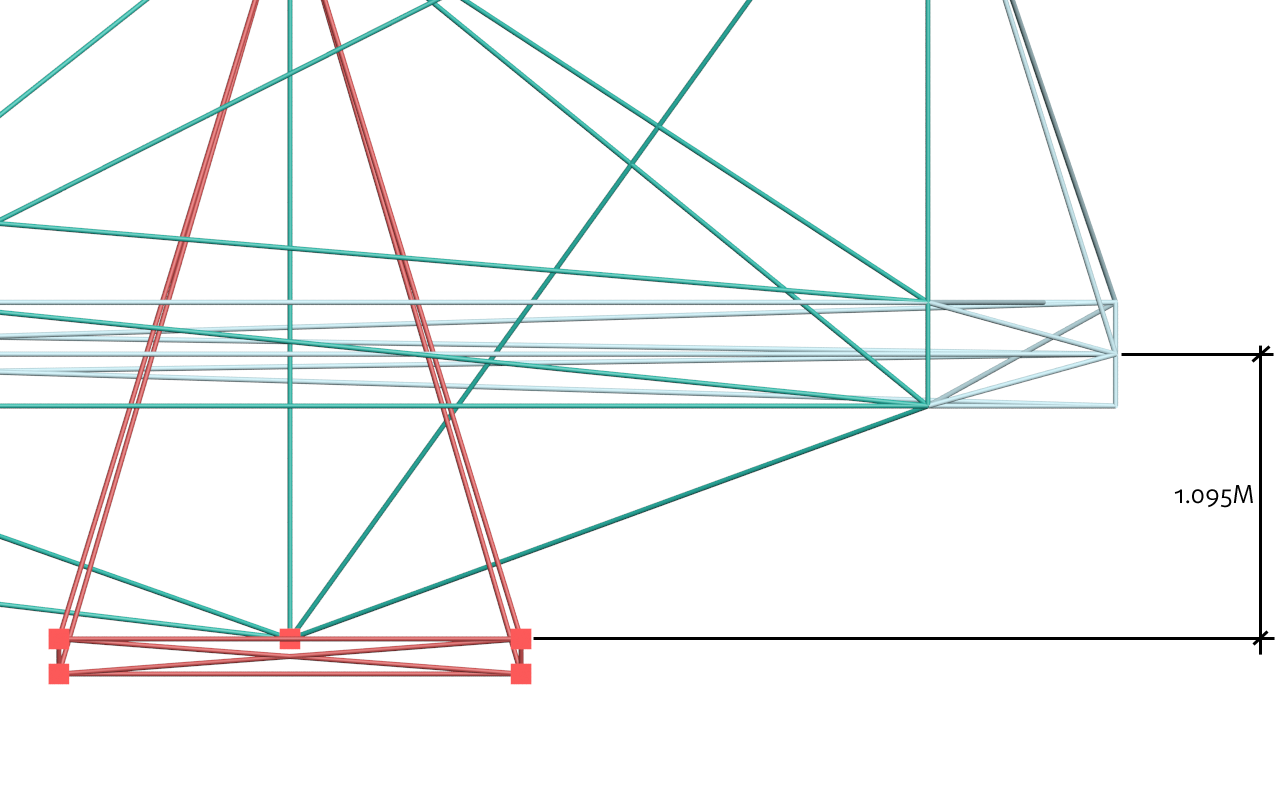
One side has a contactable slidenode connected to a shock. The other side has a contactable submesh plane that is also movable and connected to a shock. The submesh collides with the contacter and absorbs the collisions. Try it out ingame to see how it works!
Troubleshooting
Q: My train is stuck in the rail or positioned wrong when spawning:
- Check the position of node
0
Q: The train derails on switches:
- Are all bogie nodes positioned correctly?
- Do all bogie nodes have the correct options? (mass, contact, friction)
Q: The ride is very bumpy
- Raise the numray count on the tires
- Add a suspension